

Updated:
Readtime: 18 min
Every product is carefully selected by our editors and experts. If you buy from a link, we may earn a commission. Learn more. For more information on how we test products, click here.
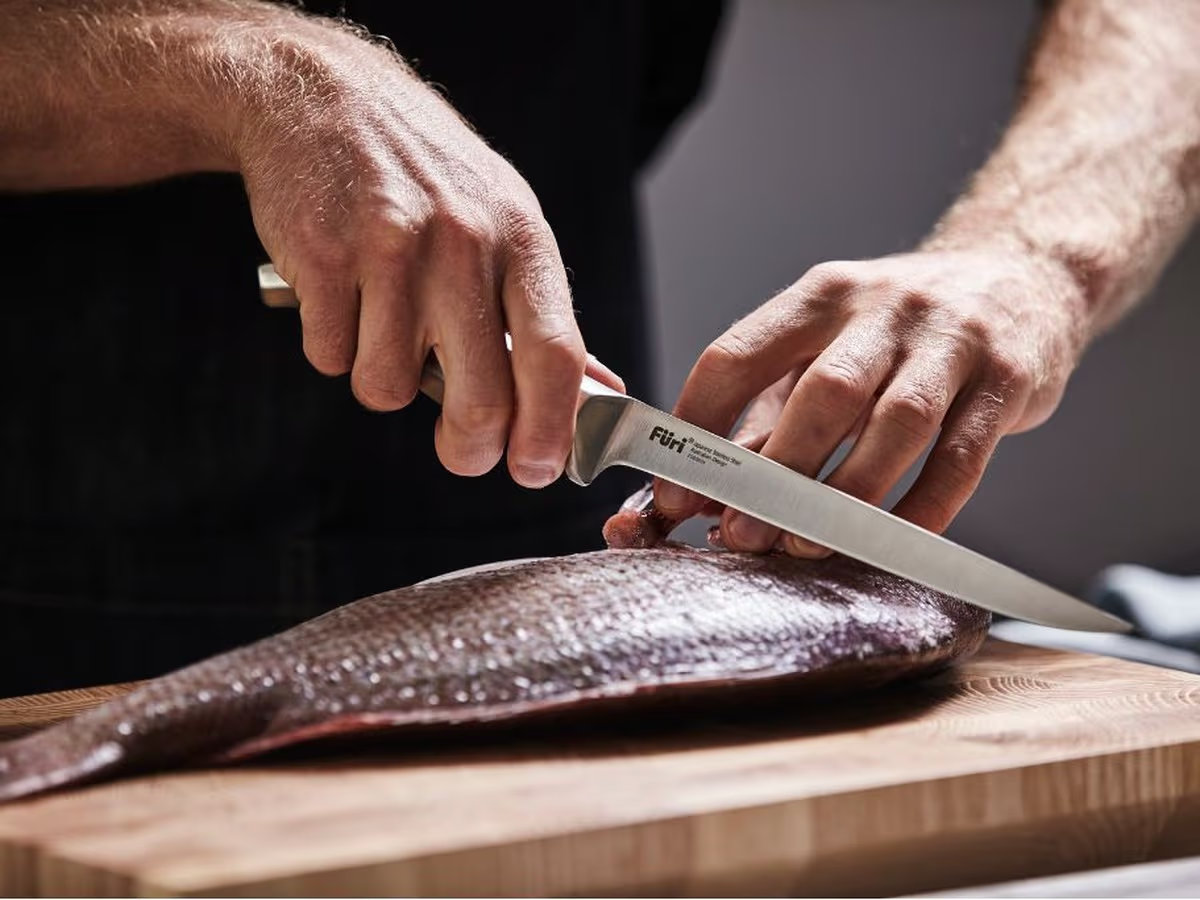
Filleting a snapper comes down to three cuts: one behind the gill plate, one along the backbone, and one up over the rib cage. Get those right and a single fish gives you two clean fillets with almost nothing worth eating left on the frame. Get them wrong, or work with a blunt blade that’s too thick to follow bone, and you’ll leave a third of the good meat behind.
This guide covers the whole job, from bleeding and icing the fish before you cut, through to pulling the last pin bone and storing what you do not cook tonight. The knife matters more than any other piece of kit, which is why the Furi Pro Filleting Knife 17cm sits at the centre of the kit list below.
How to Fillet a Snapper: The Short Version
If you already know your way around a fish and just want the sequence, here it is. Every step is explained in full further down.
- Bleed and chill the fish. Cut the gill arches, let it bleed out, then drop it into an ice slurry.
- Scale it only if you are keeping the skin on. Rinse off slime and grit, then pat the fish dry so it doesn’t slide.
- Cut in behind the gill plate and pectoral fin, angling slightly towards the head, until the blade meets the backbone.
- Turn the blade flat and ride the backbone from head to tail in long strokes, never a sawing motion.
- Work the blade up and over the rib cage, then push it right through once the rib cage runs out toward the back half of the fish.
- Free the fillet at the tail, flip the snapper and repeat on the other side.
- Lift the ribs off in one sheet, pull the pin bones towards the head, then skin the fillet or leave the skin on for the pan.
What You Need to Fillet a Snapper
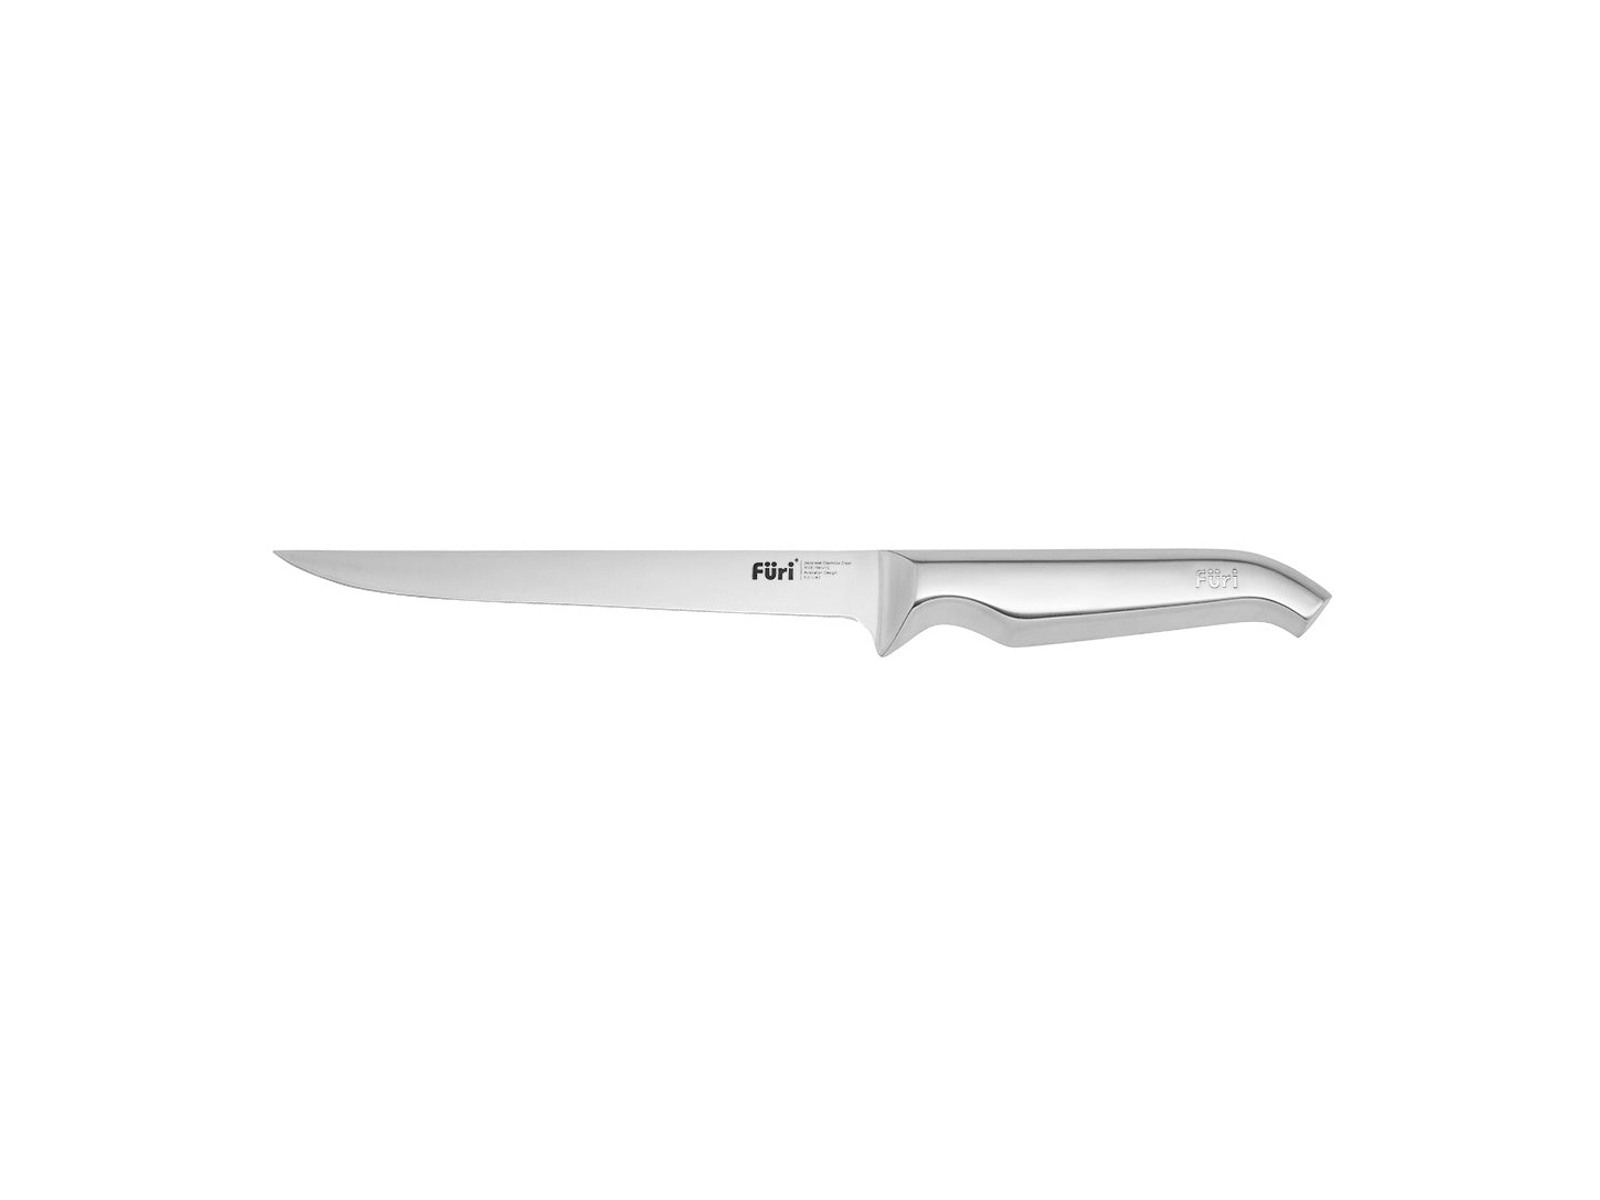
The list is genuinely short. A long, thin blade that will bend around bone, a board that will not slide and will not blunt the edge, a cloth to keep your hands dry, and somewhere cold to put the fillets the moment they come off the fish.
- Furi Pro Filleting Knife 17cm ($109.95): the one piece that changes the result. A 17cm blade, narrow and tapered so it can follow the curve of the rib cage instead of ploughing through it.
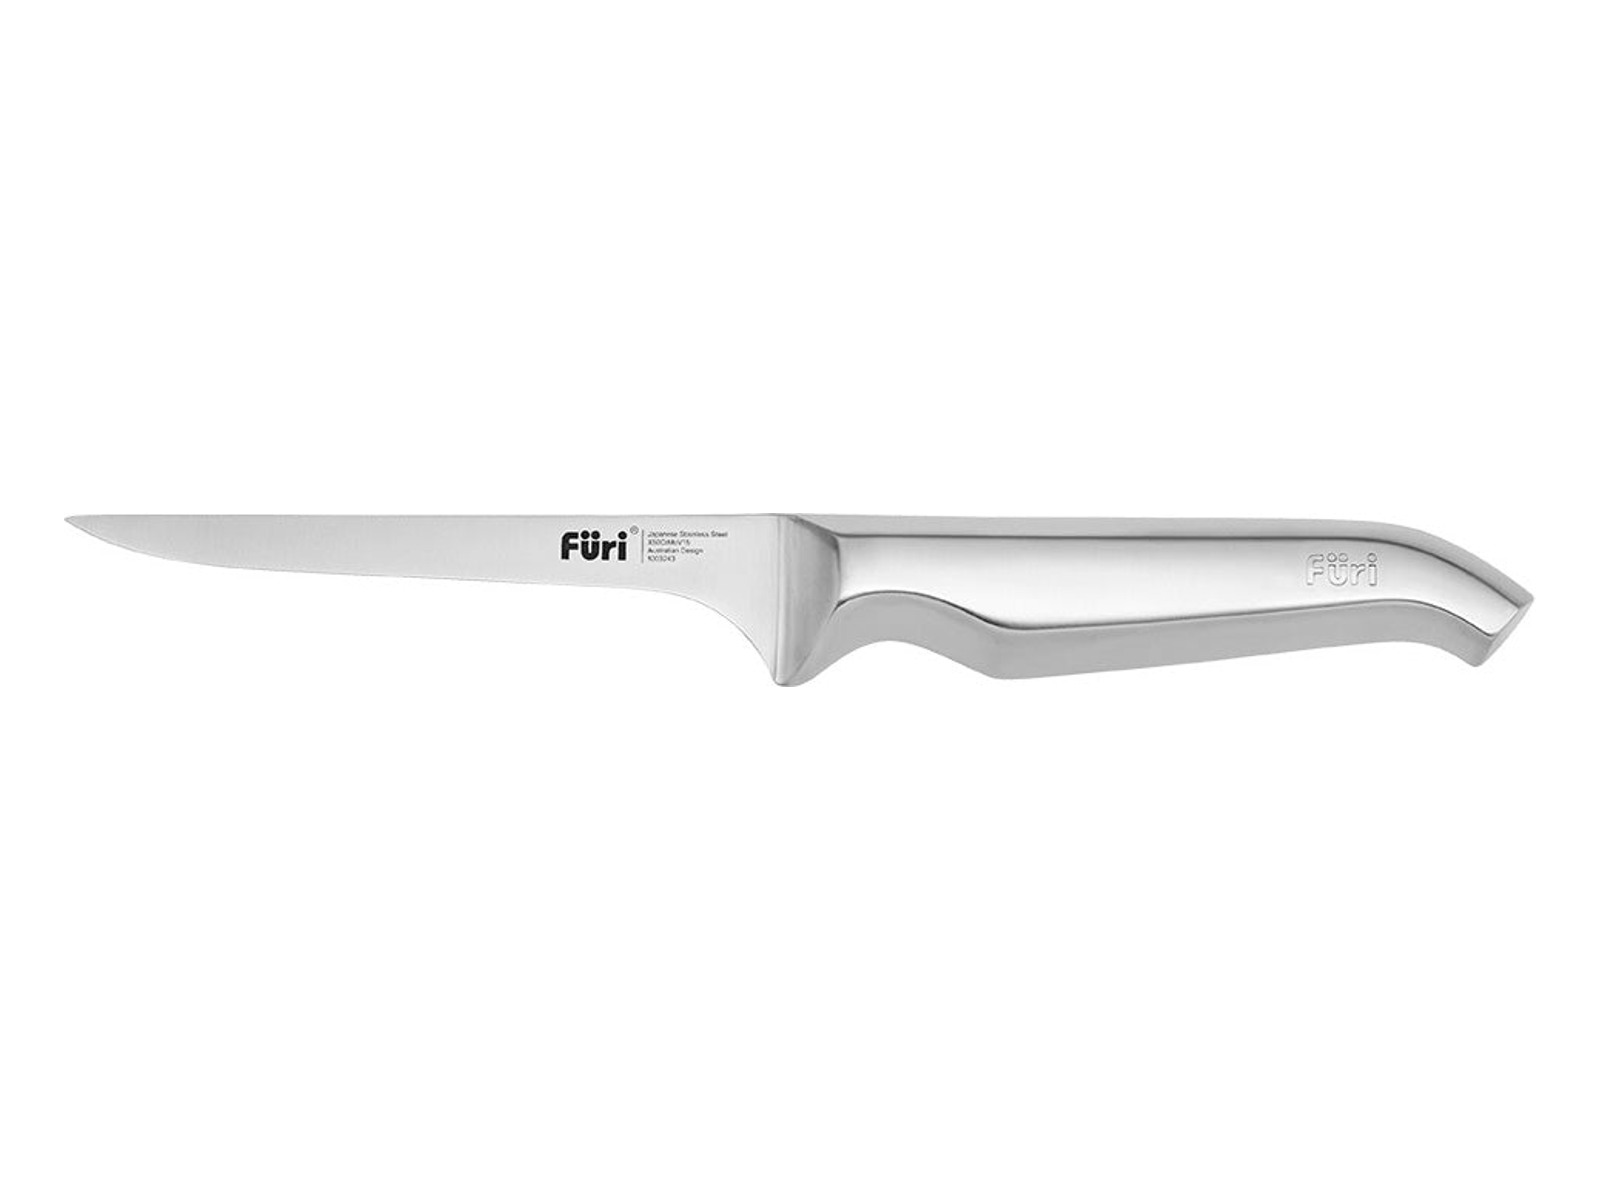
- Furi Boning Knife 13cm ($99.95): optional, but a shorter 13cm blade is easier to control when you are lifting the rib sheet off a finished fillet or taking the cheeks out.
- Furi DuraBoard Cutting Board 44 x 32.5cm ($89.95): big enough for a whole fish, non-porous so it will not hold the smell, and dishwasher safe, which matters more with fish than with anything else you cut.
- Furi Diamond Fingers Compact Knife Sharpener ($59.95): a few pulls between fish is the difference between clean fillets and torn ones.
- Fish pliers or sturdy tweezers: pin bones do not come out with fingers.
- An esky with an ice slurry: ice plus sea water, not ice on its own.
Everything above ships free on Furi orders over $50, and every Furi knife carries a 25 year guarantee. If you want the wider range rather than just the fish kit, our guide to the best Furi knives and kitchen tools covers the blades that earn their spot on a home bench.
Before You Cut: Bleed the Fish and Get It Cold
Most of the difference between a good snapper fillet and a mediocre one is decided before the knife touches the fish. Snapper flesh is soft and it softens further in heat, so the two jobs that matter happen on the boat, not on the bench.
Bleed it straight away. Cut through the gill arches on one side, or make a cut behind the pectoral fin, and let the fish pump itself out over the side or into a bucket of sea water. A bled fish gives you pale, clean fillets. Blood left sitting in the flesh darkens it and turns metallic within a day.
Then get it cold, fast. An ice slurry, meaning ice mixed with sea water, chills a fish far quicker than loose ice sitting on top of it, because the water carries the cold into every part of the fish at once. Use sea water rather than fresh: fresh water leaches into the flesh and turns the surface soft and cloudy.
Do not fillet a fish that is still stiff if you can avoid it. A snapper in rigor is awkward to lay flat and the flesh grips the frame. Give it a few hours on ice and the fillets will come away far more cleanly.
How to Fillet a Snapper, Step by Step
Work on a stable board with the fish laid on its side, back edge away from you. If you are right handed, put the head to your left. Keep a cloth under the board and another for your hands, because a wet grip is how people get cut.
Step 1: Scale and Rinse, or Skip the Scaling
Scale the snapper only if you intend to cook it skin on, and do it before you fillet. Scaling a loose fillet tears it. Work from tail to head with the back of a knife or a scaler, ideally in a sink or a tub, then rinse the fish and pat it properly dry. Snapper carry a fine slime coat, and a slimy fish moves under the blade at exactly the wrong moment. If you are going to skin the fillets, skip the scaling entirely and save yourself the mess.
Step 2: Cut Behind the Gill Plate and Pectoral Fin
Lift the pectoral fin and set the blade just behind it, running down and slightly towards the head. Angling towards the head is the part most people miss: a straight vertical cut leaves the thick shoulder meat sitting on the frame, and on a decent snapper that shoulder is the best part of the fillet.
Cut down with firm, even pressure until you feel the blade stop against the backbone. That resistance is your marker. Do not try to cut through the spine.
Step 3: Ride the Backbone From Head to Tail
Turn the knife so the blade lies flat against the backbone with the spine of the knife tilted slightly upwards. Starting at the head end, draw the blade towards the tail in long strokes, using the full 17cm of the blade rather than short strokes at the tip. You should feel and hear the edge ticking along the vertebrae, and that ticking is what tells you the blade has not wandered up into the fillet.
Keep the pressure light and let the knife find the bone. Pushing harder does not cut more cleanly, it just lifts the blade off the frame and costs you meat.
Step 4: Work the Blade Up and Over the Rib Cage
For the first third of the fish the ribs stop the blade going any deeper towards the belly. That is expected. Angle the blade upwards so it skims over the outside of the rib cage, peeling the flesh off the bones rather than cutting through them.
Toward the back half of the body the ribs run out. From that point the knife passes straight through the fish, so push the tip out through the belly side and run the blade back along the vertebrae all the way to the tail.
Step 5: Free the Fillet and Turn the Fish
Cut through the skin at the tail to release the fillet, then lift it away with your free hand while the knife finishes any last attachment near the head. Turn the snapper over and repeat the whole sequence on the second side. The second fillet is usually neater, because by then you know exactly where the bones sit on that particular fish.
Step 6: Lift the Ribs and Pull the Pin Bones
Lay the fillet skin side down. The rib bones sit in a sheet near the head end. Slide the blade underneath them at a very shallow angle, almost flat to the board, and lift the whole sheet off in one pass. Cutting steeply here is the most common way to lose a chunk of the best meat.
Now run a fingertip down the centreline from the head end. The pin bones sit in a row and angle forwards, so pull each one towards the head rather than straight up, using pliers or sturdy tweezers. Pulling against the angle tears the flesh. A shorter blade such as the Furi Boning Knife 13cm gives you more control for this trimming work than a full length fillet knife does.
Step 7: Skin the Fillet, or Leave the Skin On
Place the fillet skin side down with the tail nearest you. About a centimetre in from the tail, cut down through the flesh until you reach the skin but not through it. Turn the blade flat, grip the little tail flap firmly, and push the knife forward while pulling the skin back underneath it. Angle the edge very slightly down into the skin: if you angle upwards you will shave flesh off and leave it behind.
That said, snapper skin crisps beautifully and holds a delicate fillet together in a hot pan. If you scaled the fish at the start, leaving the skin on is usually the better call.
Do Not Bin the Frame
Two fillets is the obvious yield, but a snapper frame carries several of the best cuts on the fish, and almost everyone throws them out.
- The cheeks. A round nugget of firm meat sits behind each eye. Cut around the edge with a short blade and pop it out. On a large snapper each cheek is a mouthful worth having.
- The wings and collars. The section behind the head, taking in the pectoral fin, is the fattiest and most flavourful part of the fish. Cut the collar off the frame in one piece and grill it hard.
- The throat latch. The strip under the jaw is small but rich, and it takes seconds to remove once the collar is off.
- The frame itself. Rinse the blood line out, then simmer the bones and head for about twenty minutes for a clean fish stock. Any longer and it turns bitter.
How to Store Snapper Fillets
Snapper does not improve in the fridge, so treat the clock as running from the moment the fish came out of the water.
- In the fridge: sit the fillets skin side up on a rack over a tray of ice, covered, in the coldest part of the fridge. Eat them within two days.
- Never sit fillets directly in melt water. The rack matters, because fresh water sitting against the flesh turns it soft and washes out the flavour.
- In the freezer: wrap each fillet tightly with the air pressed out, or vacuum seal it, and freeze it flat so it thaws evenly. Three months is a fair limit before the texture starts to go.
- Thaw in the fridge overnight, never on the bench and never under hot water. Do not refreeze a fillet you have already thawed.
Five Mistakes That Cost You Fillet
- Using a blunt knife. A dull edge cannot follow bone, so it pushes through flesh instead. Almost every ragged fillet starts here.
- Sawing instead of stroking. Short back and forth strokes shred the flesh. One long draw along the full blade does the job cleanly.
- Cutting straight down at the gill plate. Angle towards the head or you leave the shoulder meat on the frame.
- Skipping the bleed and the ice. No amount of knife skill recovers a fish that sat warm in the sun for an hour.
- Working on a wet board. Put a damp cloth underneath it. A board that slides mid cut is both a wasted fillet and a trip to the emergency department.
The Best Knife for Filleting Snapper
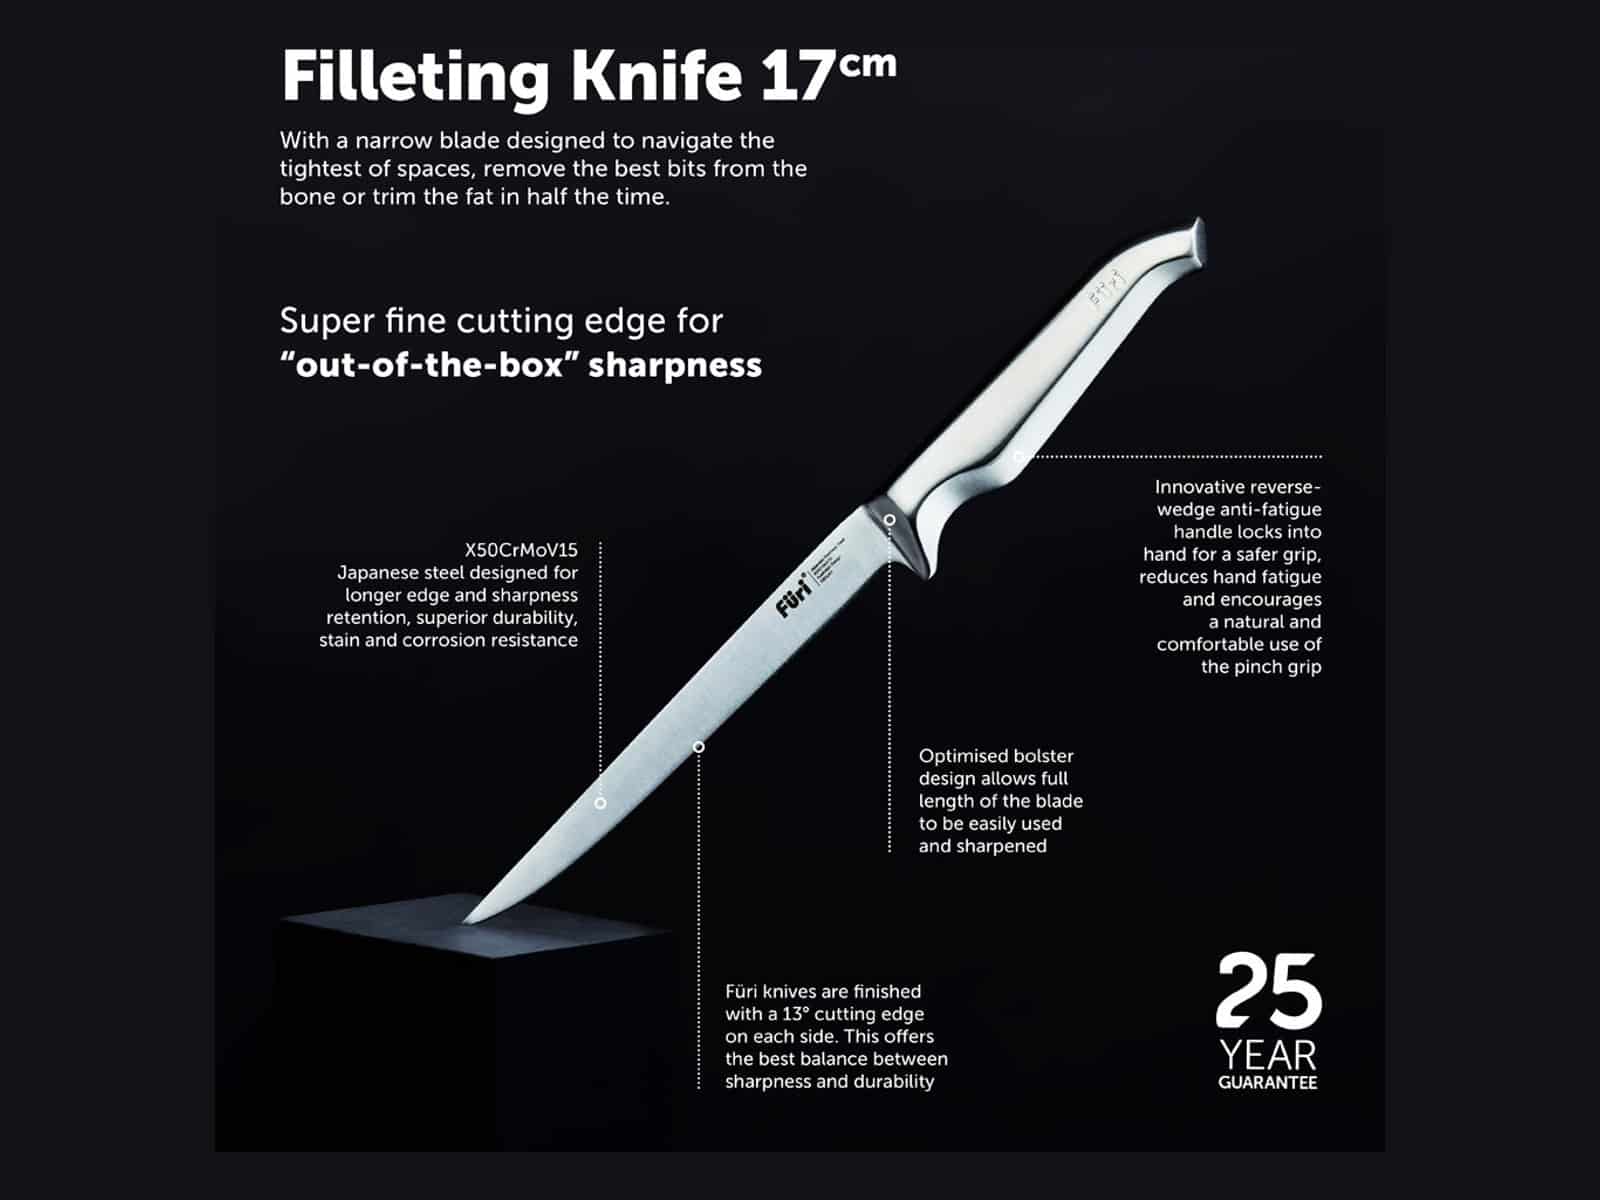
A fillet knife has one job that no other knife in the block can do: bend and track along bone without biting into it. The Furi Pro Filleting Knife 17cm is built around a thin, narrow, tapered blade for exactly that, which is what lets it work over a snapper’s rib cage and into the tight space behind the gill plate.
- Price: $109.95 AUD
- Blade length: 17cm / 7 inch
- Steel: X50CrMoV15 Japanese stainless, chosen for edge retention and corrosion resistance, which matters on a knife that meets salt water
- Edge: Tech Edge blade, hand sharpened to 13 degrees per side for a 26 degree cutting angle
- Hardness: 55 to 57 on the Rockwell scale, reached over 14 hardening and tempering steps
- Handle: reverse-wedge anti-fatigue design that locks into the hand and resists slipping towards the blade
- Construction: seamless, so there is no join for fish residue to sit in
- Origin and cover: designed in Australia, backed by a 25 year guarantee
Furi claims the blade outperforms ten of the leading knife brands on sharpness, and credits independent ICP and TCC testing conducted by CATRA, the UK cutlery research body, rather than in-house numbers. The practical version of that on a fish is simple: the sharper the edge, the less pressure you need, and the less pressure you use the closer the blade stays to the bone.
One caution worth naming. Furi asks that its knives be hand washed in warm soapy water with the blade pointed away, then dried thoroughly. That is not fussiness on a fish knife. Salt and fish acids left on a wet blade overnight are how stainless steel picks up spotting.
Keep the Edge Between Fish
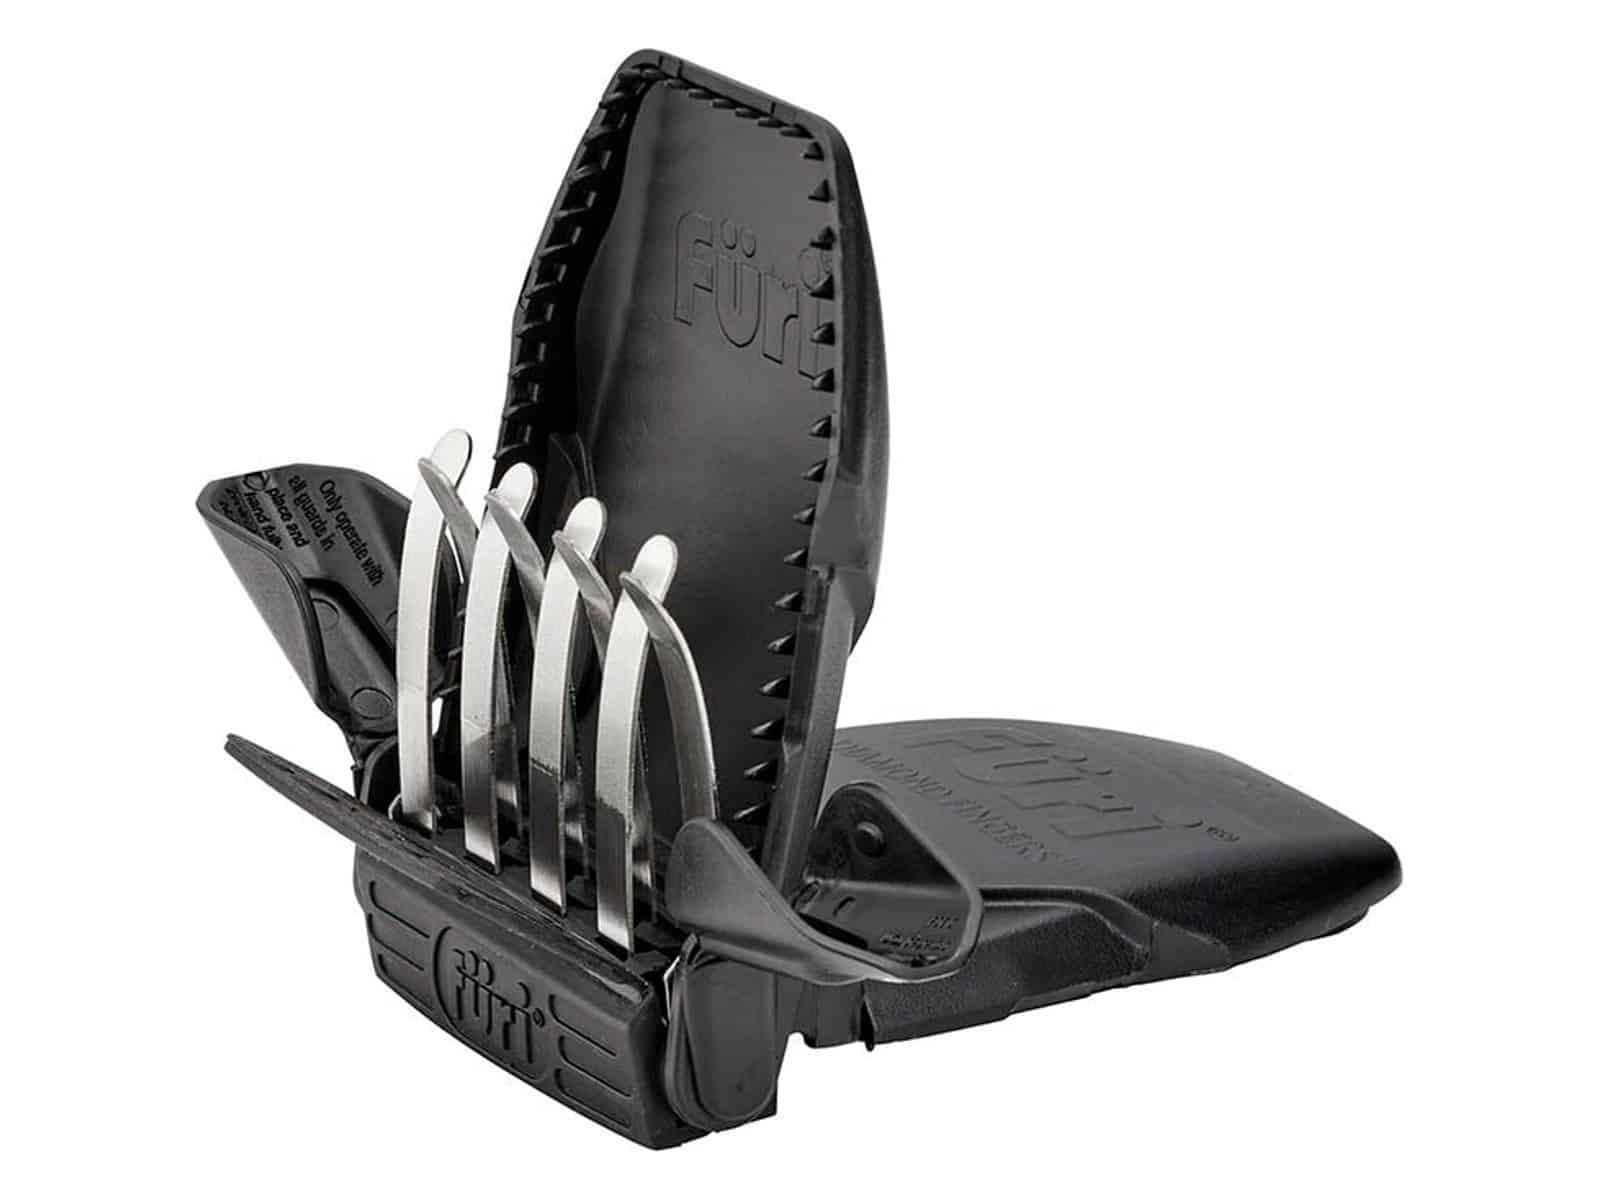
Filleting blunts a knife faster than almost anything else in the kitchen, because you are repeatedly running the edge along bone. If you are working through a session’s catch, pull the blade through a sharpener between fish rather than fighting a fading edge for the last three. The Furi Diamond Fingers Compact Knife Sharpener ($59.95) uses an industrial grade diamond coating and takes a few seconds, and its optimised bolster means the full length of the Furi blade can be sharpened rather than just the middle.
If you would rather learn to do it properly by hand, our guide on how to sharpen a knife like a professional walks through whetstones and honing rods, both of which give you more control than any pull-through device.
Why the Board Matters as Much as the Blade
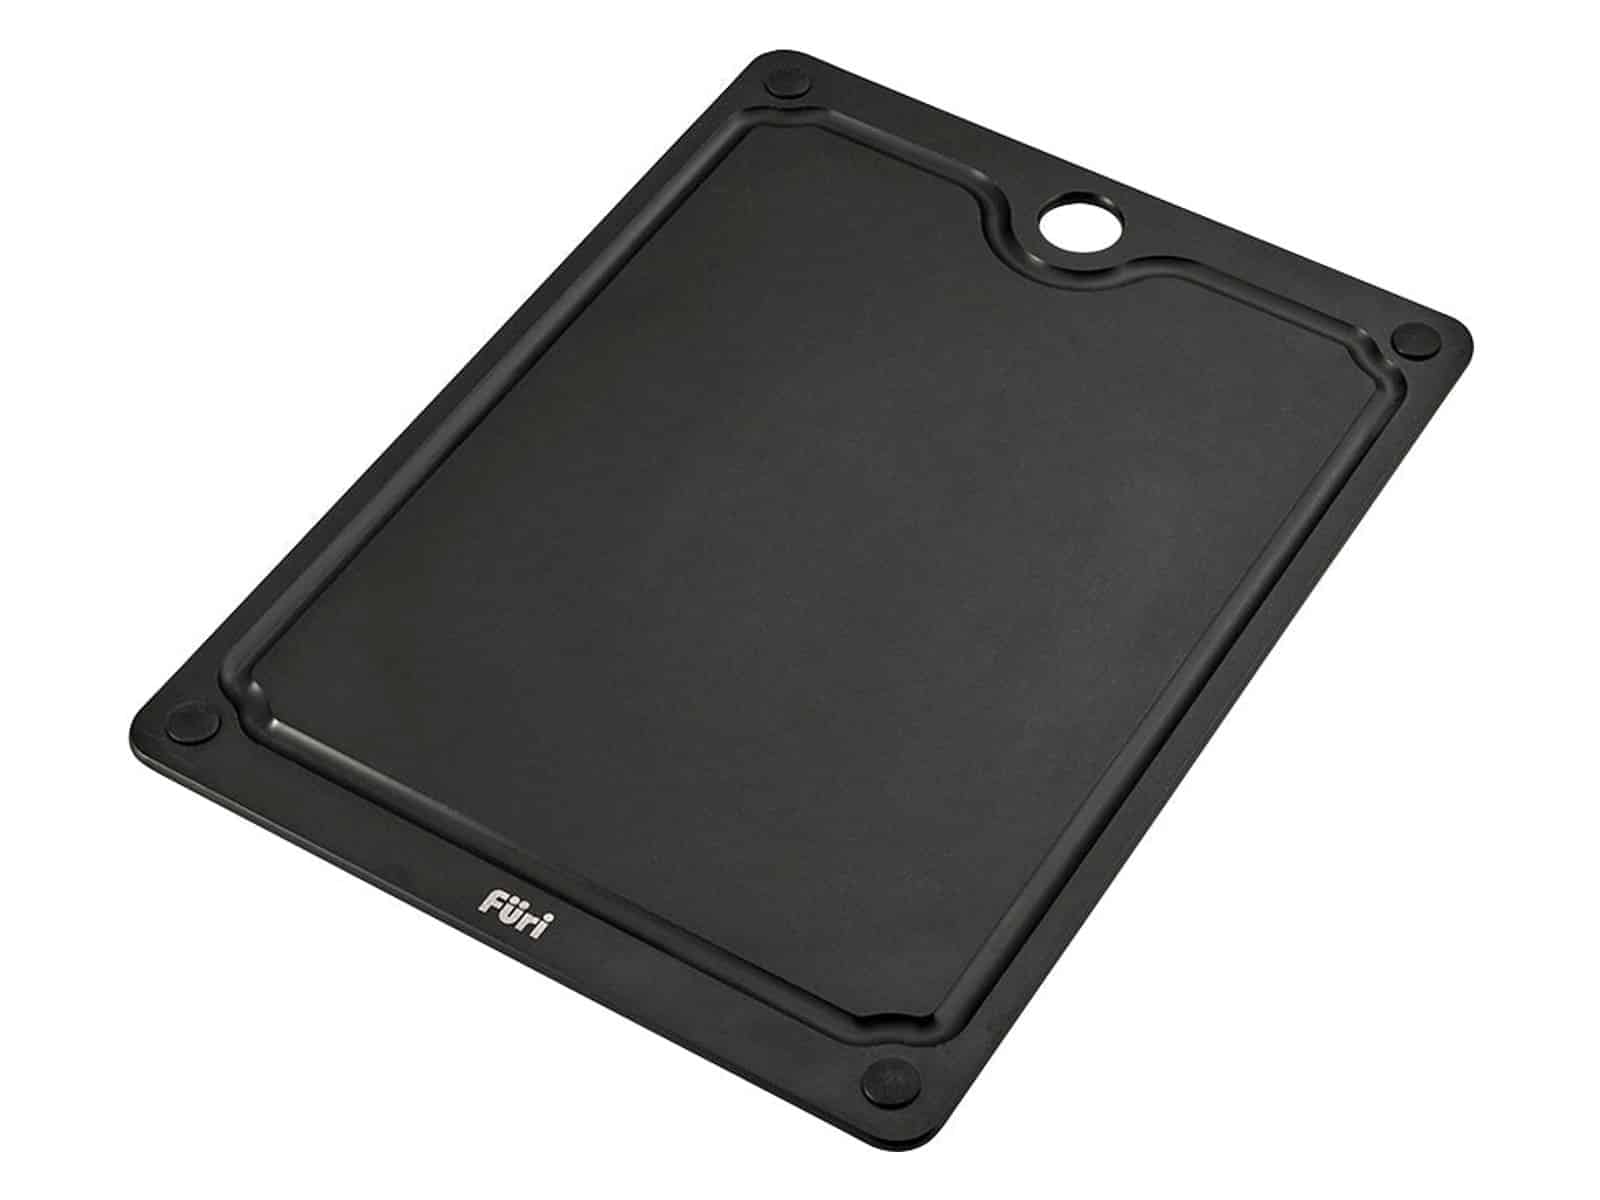
Fish is the one job where a timber board works against you. Timber is porous, it holds the smell, and it needs oiling rather than a hot wash. The Furi DuraBoard Cutting Board 44 x 32.5cm ($89.95) is made from FSC certified wood fibre composite, which is non-porous and dishwasher safe, and it is heat resistant to 175 degrees Celsius. It also runs a juice channel around one side and takes removable silicone feet, so it holds still while you work and catches what comes off the fish.
At 44 x 32.5cm there is room to lay a whole snapper flat, which matters more than it sounds. If you are also breaking down the frame, a Furi Chef’s Knife 23cm ($139.95) handles the heavy work that a thin fillet blade should never be asked to do.
Australian Snapper: What You Are Actually Filleting
Worth knowing before you copy a technique off the internet: the fish Australians call snapper is Chrysophrys auratus, the Australasian snapper, and it is not a true snapper at all. It belongs to the sea bream family, Sparidae, not to the Lutjanidae. The American red snapper you see in most filleting videos is Lutjanus campechanus, a different family with a different body shape and a different rib structure. The broad method transfers, the specifics do not.
The same fish also picks up different names as it grows, which is why the label at the co-op can be confusing. Undersize fish are cockies, legal size fish get called pinkies or red bream, bigger ones are squire, and only the full grown fish, with the pronounced hump on the head, is generally called a snapper. All of them are the same species. The Australian Museum keeps a good reference on the species, including the older name Pagrus auratus that still appears in a lot of print.
One practical point. Minimum legal lengths and bag limits for snapper are set state by state, they change, and they are tightened during spawning closures in some waters. Check the current rules with your own fisheries authority before you keep a fish, not after: NSW DPIRD, Victorian Fisheries Authority, Queensland, PIRSA, WA DPIRD and Tasmania.
Not catching your own? A whole snapper from a fish market is usually better value than fillets, and you get the frame and collars as well. Our guide to the new Sydney Fish Market is a good place to start, or work out where to drop a line with our picks of the best fishing spots in Sydney and Brisbane.
How to Fillet a Snapper FAQs
A dedicated filleting knife with a long, thin, tapered blade, so it can flex around the rib cage instead of cutting through it. The Furi Pro Filleting Knife 17cm is $109.95 AUD, uses X50CrMoV15 Japanese stainless steel and carries a 25 year guarantee.
Only if you plan to cook the fillets with the skin on, and always before you fillet rather than after. If you intend to skin the fillets, skip scaling altogether.
Yes. Cutting the gill arches and letting the fish bleed out, then chilling it in an ice slurry of ice and sea water, gives you paler, firmer and better tasting fillets. Blood left in the flesh darkens it and turns the flavour metallic.
Run a fingertip down the centreline of the fillet from the head end to find them, then pull each bone towards the head with fish pliers or sturdy tweezers. The bones angle forwards, so pulling straight up tears the flesh.
About two days in the fridge, sat skin side up on a rack over ice rather than in melt water. Wrapped tightly or vacuum sealed and frozen flat, roughly three months before the texture suffers.
No. Australian snapper is Chrysophrys auratus, a member of the sea bream family. American red snapper is Lutjanus campechanus, a different family with a different body shape, which is why overseas filleting videos do not always match the fish in front of you.
Take the cheeks out from behind each eye, cut the collars and wings off behind the head and grill them, then simmer the remaining bones for about twenty minutes for a clean fish stock.
Filleting a snapper is a skill that repays practice faster than most, because the feedback is immediate: you can see exactly how much you left on the frame. Bleed the fish, keep it cold, use a blade thin enough to follow bone, and the second fillet will already be better than the first. Furi ships free on orders over $50 and guarantees its knives for 25 years, so the blade is the easiest part of the equation to get right.


















Comments
We love hearing from you. or to leave a comment.