
Updated:
Readtime: 5 min
Every product is carefully selected by our editors and experts. If you buy from a link, we may earn a commission. Learn more. For more information on how we test products, click here.
A screenshot is an image taken of your computer screen. So, if you ever need to capture something on your screen, Windows offers a variety of ways you can do just that. Whether you want to capture an entire page, or just a part of a page, or whether you simply want to improve your Windows tech-savviness, here are some of the most common and easy ways to take a Windows 10 screenshot.
You’ll also like:
Is Australia Doing Enough on Emission Reductions? Judge For Yourself
How to Calculate Your BMI Properly
How to Take a Screenshot on Windows 10 with the PrtScn key
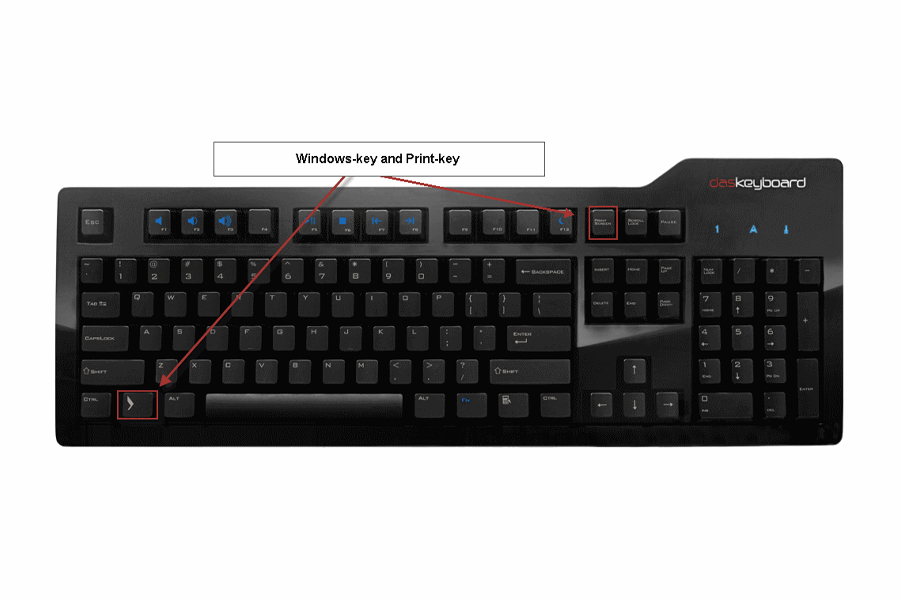
One option that works great on Windows is using the Print Screen (PrtScn) key. The PrtScn button can take a screenshot and save it as a file and can also take a screenshot of only one window. This button is usually labelled as PrtScn, PrtnScrn or, Prting Scr. On some keyboards, usually laptops, the Print Screen button may need to be triggered by holding the Function key and then pressing PrtScn. When you press the button to take the screenshot nothing will actually happen on the screen, but the screenshot will have been saved to your computes clipboard.
To save your screenshot as a file, press the ‘Windows logo key + PrtScn’, and if you’re using a tablet use the volume down button rather than the PrtScn button. When you do this, the screen will dim if you have settings that animate windows when minimising and maximising. The screenshot will automatically be saved as a number and will appear as a file in a ‘Screenshots’ folder, which you will find inside the default ‘Pictures’ folder.
To take a screenshot of only one window, simply click on the title bar of the window that you want to capture. Then, press ‘Alt + PrtScn’. This screenshot will also appear in your clipboard. If you want to paste your screenshot, open in the image editor and choose edit > paste to paste the screenshot.
How to Take a Screenshot on Windows 10 with Snipping Tool
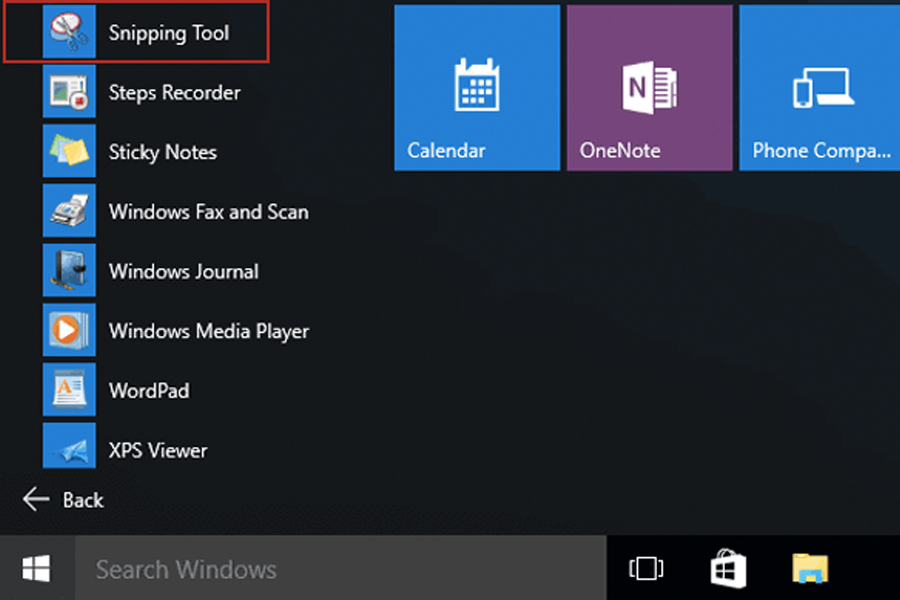
Another way to capture a screenshot of something on your computer is by using the Snipping Tool. Simply type Snipping Tool in the search box in the taskbar and select ‘Snipping Tool’. Once you have your Snipping Tool open, you can capture all or just part of your Windows screen, and you can then save, email, or add notes all using the Snipping Tool.
- To do this, in the snipping mode window select ‘Mode’.
- Choose the kind of snip you want- you can do a free-form snip, rectangular snip, window snip, and full-screen snip.
- Then, simply select the area of your computer screen that you wish to capture. To annotate a snip, select the ‘Pen’ or ‘Highlighter’ button.
- You can use the ‘Eraser’ to remove any unwanted lines you have drawn.
- To save a snip, select ‘Save Snip’, where a box will pop up, then select ‘Save.’ To share a snip, select the arrow next to the ‘Send Snip’ button, then select an option from that list.
The Snipping Tool is therefore a great way to capture and share your screenshots on Windows.
How to Take a Screenshot on Windows 10 with the Game Bar
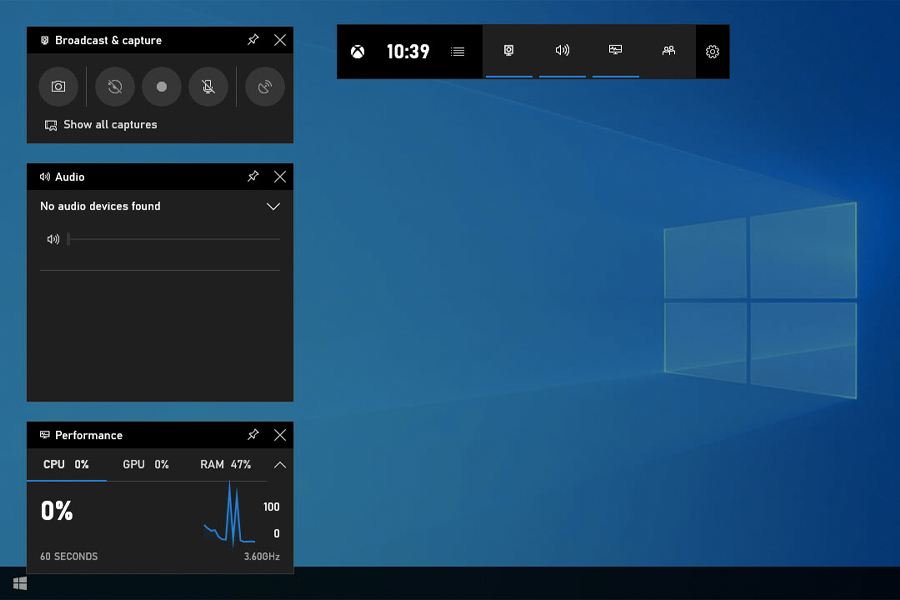
Another method of taking a screenshot on Windows 10 is by using the Game Bar. Windows 10 is different as it works with game digital virtual reality capabilities. This means that Windows 10 technology enables gameplay footage to be recorded and take screenshots of Windows PC games. This development has been a lifesaver for gamers!
The way the Game Bar does this is by generating screenshots in PNG format. It then saves them in Users > > Videos > Captures. However, before starting to use the Game Bar, make sure to launch the Xbox app that comes with Windows 10 and open its settings. In the settings, under ‘Game DVR’, toggle ‘Take screenshots using Game DVR’ and assign whatever keyboard shortcuts that you like.
- When you want to take a screenshot using this method, press ‘Windows key + G’ and then click on the ‘Yes, this is a game’ box if prompted.
- Then, press the camera icon or you can also press ‘Windows + Alt + PrtScn’ to take a screenshot. Be wary, this shortcut only works if you have previously selected the ‘Yes, this is a game’ box that was mentioned earlier, for this specific game.
- Once you take the screenshot, you will see a notification pop up telling you that your screenshot has been saved.
- If you wish to see the screenshot, tap on the notification. It will then open to ‘Xbox > Game DVR > On this Pc’, which will allow you to view it.
You’ll also like:
What does Cheugy Mean? Gen Z’s New Favourite Phrase
How to Calculate Your BMI Properly
General FAQ
No, it is quite simple to screenshot on Windows. To screenshot on pc, there are three ways to do this. To take a screenshot on Windows 10, you can use the print screen, Snipping Tool or you can take a screenshot with the Game Bar setting.
To take a screenshot on Windows, the easiest way is to press a single button. you can do this by pressing the print screen key which looks like ‘PrtScn’ on your keyboard.


Comments
We love hearing from you. or to leave a comment.