

Updated:
Readtime: 26 min
Every product is carefully selected by our editors and experts. If you buy from a link, we may earn a commission. Learn more. For more information on how we test products, click here.
- A well-configured surround sound system doesn’t need to be expensive. Proper speaker placement, connections and calibration can make a bigger difference than upgrading your equipment.
- Traditional 5.1 systems use five speakers and a subwoofer, but smaller setups like 3.1 or a soundbar may be more practical depending on your room.
- Getting the best sound means balancing speaker positioning, bass management and room calibration before deciding whether an equipment upgrade is necessary.
You can spend good money on the latest OLED TV and a stack of high-end surround sound speakers for a more cinematic experience at home, only to find yourself turning the subtitles on because the dialogue is hard to hear. Meanwhile, an explosion rattles your partner’s eardrums in the other room, and those rear speakers you carefully installed barely seem to do anything.
More equipment or more expensive brands aren’t always the answer. Speaker placement, the right connections and all those settings buried deep within an AV receiver’s menus can significantly affect how everything sounds. Even a fairly modest system can punch well above its weight when it’s set up for the room it’s actually in.
Whether you’re assembling your first surround sound system, wondering if a sound bar will do the job or trying to get more out of gear you already own, here’s how to put it together, make sense of the technology you’re listening to and know when an upgrade is worth considering, or whether a bit more tinkering is in order.
1. Choose the Right Surround Sound Setup for Your Room
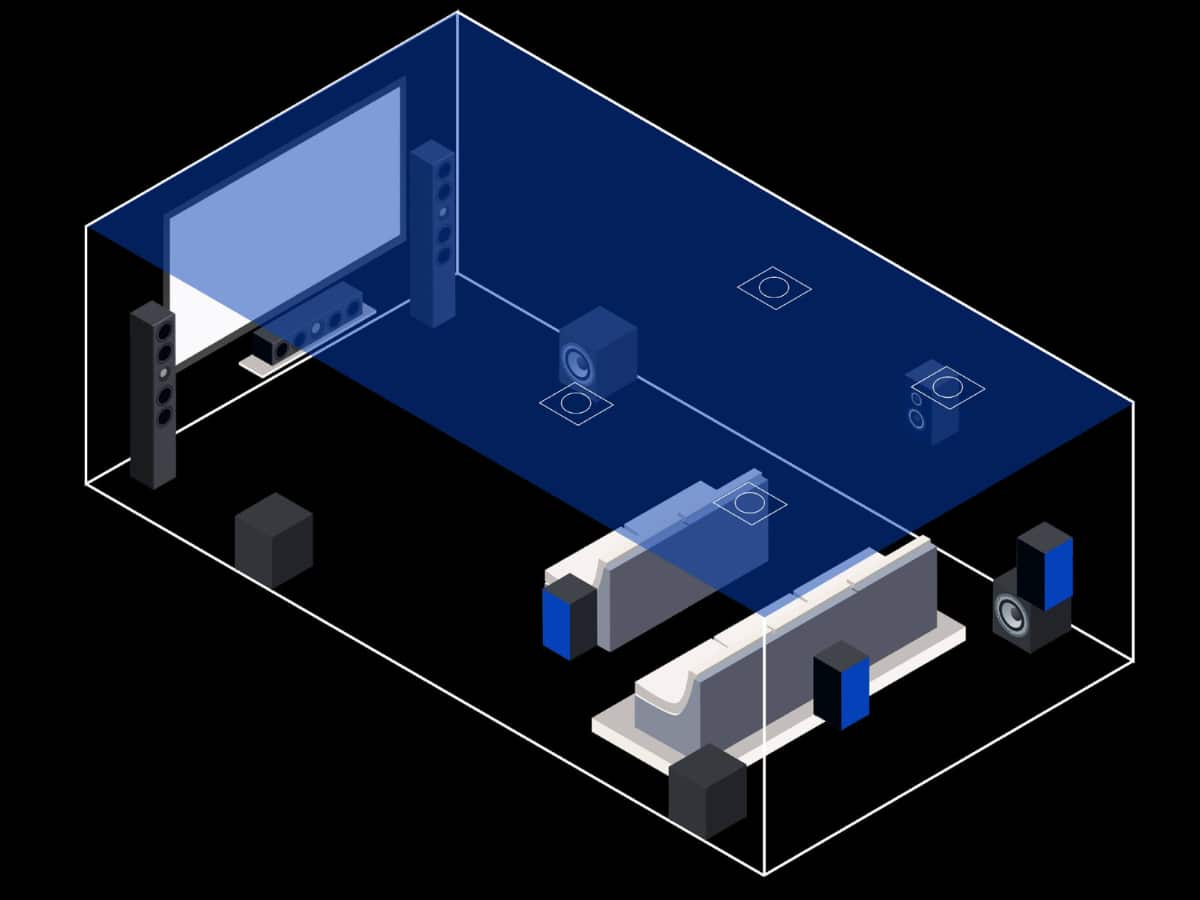
Before you start worrying about speaker cables and crossover frequencies, work out how many speakers you actually need. Most of us are already familiar with stereo, even if we don’t think about it. Put on a pair of earbuds or headphones, and you’ll hear sounds separated between the left and right channels. That’s the basis of a conventional two-speaker setup, which brings us to a range of numbers you’ve probably seen before, like 2.1, 5.1, 7.1 and more. Those combinations of digits describe the speaker arrangement for home-theatre equipment.
Conventional Speaker and Surround Sound Layouts
- 2.0 System: two stereo speakers
- 2.1 System: two stereo speakers + subwoofer
- 3.1 System: two stereo speakers + centre speaker + subwoofer
- 5.1 System: two stereo speakers + centre speaker + two surround speakers + subwoofer
- 7.1 System: two stereo speakers + centre speaker + two surround speakers + two rear speakers + subwoofer
It all starts with stereo. Adding a centre speaker in a 3.1 setup gives dialogue its own dedicated channel, rather than sharing it between the front left and right speakers. A 5.1 system then brings sound effects and ambience around your seating position, while 7.1 adds a pair of surround-back channels for more precise movement behind you. These are the most common layouts you’ll come across, and while more advanced configurations exist, not every combination is physically possible.
The middle number usually refers to the subwoofer count. In larger layouts, like those using Dolby Atmos, the third number indicates the height channels. For example, 5.1.2 means five conventional speakers, one subwoofer and two overhead or upward-firing speakers.
A conventional 5.1 system remains an excellent starting point for movies, television and music, but you don’t need to fill every available corner with speakers. A properly positioned 3.1 setup in a smaller living room is a far more sensible option than seven speakers squeezed into the wrong places. For those who do have the space, or better still, a dedicated cinema room, the world is your oyster.

What About Soundbars?
Soundbars take a simplified approach to surround sound, combining several speakers and their amplification into one unit that sits near the TV. Some come with wireless subwoofers and dedicated rear speakers. Standalone bars often rely on processing and audio tricks to create the impression of speakers behind or above you. Bars with separate surrounds can deliver sound from actual speakers around the room. Most audiophiles will probably still prefer the control and positioning of a well-optimised surround system, but that doesn’t mean a decent soundbar can’t do the job.
They’re typically easier to install, take up less space and can be a more sensible option for apartments, rentals or anyone who doesn’t want speaker cable running all across the room. Compared to a poorly calibrated 5.1 system, they might sound better, too.
The trade-off for all that simplicity often comes down to flexibility. With an AV receiver and separate speakers, you have more freedom to position, configure and replace individual components. A soundbar is generally a more self-contained system and a one-stop shop for anyone who doesn’t have the time, patience or passion to go any further.

What About Apple’s HomePod Surround Sound?
Apple has another option for anyone who’d rather skip the AV receiver and speaker cables. The fourth-generation Apple TV 4K supports a four-speaker surround sound setup using matching front and rear pairs of HomePod mini 2 speakers, full-sized HomePods (2nd generation) or a combination of both.
The system automatically calibrates speaker timing and levels based on their positions in the room, making it a convenient alternative to a conventional surround setup. The catch? You’re tied to compatible Apple hardware, and there’s no dedicated subwoofer for handling those deep bass effects.
But if you’re leaning towards a traditional surround sound system, don’t let all those separate components dissuade you; it’s far more accessible than you might think. Even with the different equipment involved, it’s well worth it in the long run if you want to bring some of the cinema-movie magic home.

2. Understand Your Equipment and What It Can Play
For a traditional 5.1 system, you’ll need five speakers, a powered subwoofer and an AV receiver (AVR), along with speaker wire and HDMI cables. Quick note on that: Don’t get sucked into spending a fortune on HDMI cables. Just make sure they’re certified for the features you need, such as 4K at 120Hz, which calls for an Ultra High Speed HDMI cable rated for 48Gbps. Anyway, back to the speakers.
The front left and right speakers handle music and most of the soundtrack. The centre speaker delivers dialogue, anchoring it to the screen, while the surrounds carry effects and ambience. The subwoofer takes care of deep bass and the dedicated low-frequency effects (LFE) channel. Without those rear speakers, a 3.1 layout will play those sounds through the remaining speakers. Basically, more speakers allow for greater separation and more precise positioning of effects around the room, provided everything is set up correctly.
Your AVR runs the entire show. As the brains of the operation, it decodes incoming audio, powers passive speakers (those without built-in amplifiers), and routes bass to the subwoofer. It provides the settings to balance everything that reaches your ears. A powered subwoofer has its own amplifier for reproducing deep bass, including the LFE channel and bass redirected from the other speakers. That’s why it normally connects to the receiver’s subwoofer pre-out rather than a regular speaker terminal.
Example: My Current 5.1 Home Surround Sound System
My current living-room system is a good example of how these components come together without buying a matching set or overspending. At home, I have the Polk Reserve R500 floorstanders and an R300 centre up front, with some older JPW 200 surrounds behind the sofa (hand-me-downs from my grandfather), a Yamaha YST-SW100 subwoofer (donated to me by my dad) and a Denon AVR-S660H directing traffic. It’s a conventional 5.1 arrangement in an open-plan room, not a purpose-built cinema.
- AVR: Denon AVR-S660H
- Left and Right: Polk Reserve R500 floorstanders
- Centre: Polk Reserve R300
- Subwoofer: Yamaha YST-SW100
- Surrounds: JPW 200
- TV: 65-inch LG OLED evo AI C5 (2025)
3. Position Your Speakers Correctly
Sound doesn’t travel straight from a speaker to your ears and stop there. It reflects off walls, interacts with furniture and behaves differently at low frequencies. That’s why speaker placement matters, and why it’s often where systems either come together in harmony or fall apart, competing with the physical room.
The first place to start for speaker placement is the main listening position, otherwise known as the middle of the couch. Whether you’re a millionaire with your own cinema room or building your first surround system in your rental apartment, everything starts from this central position.
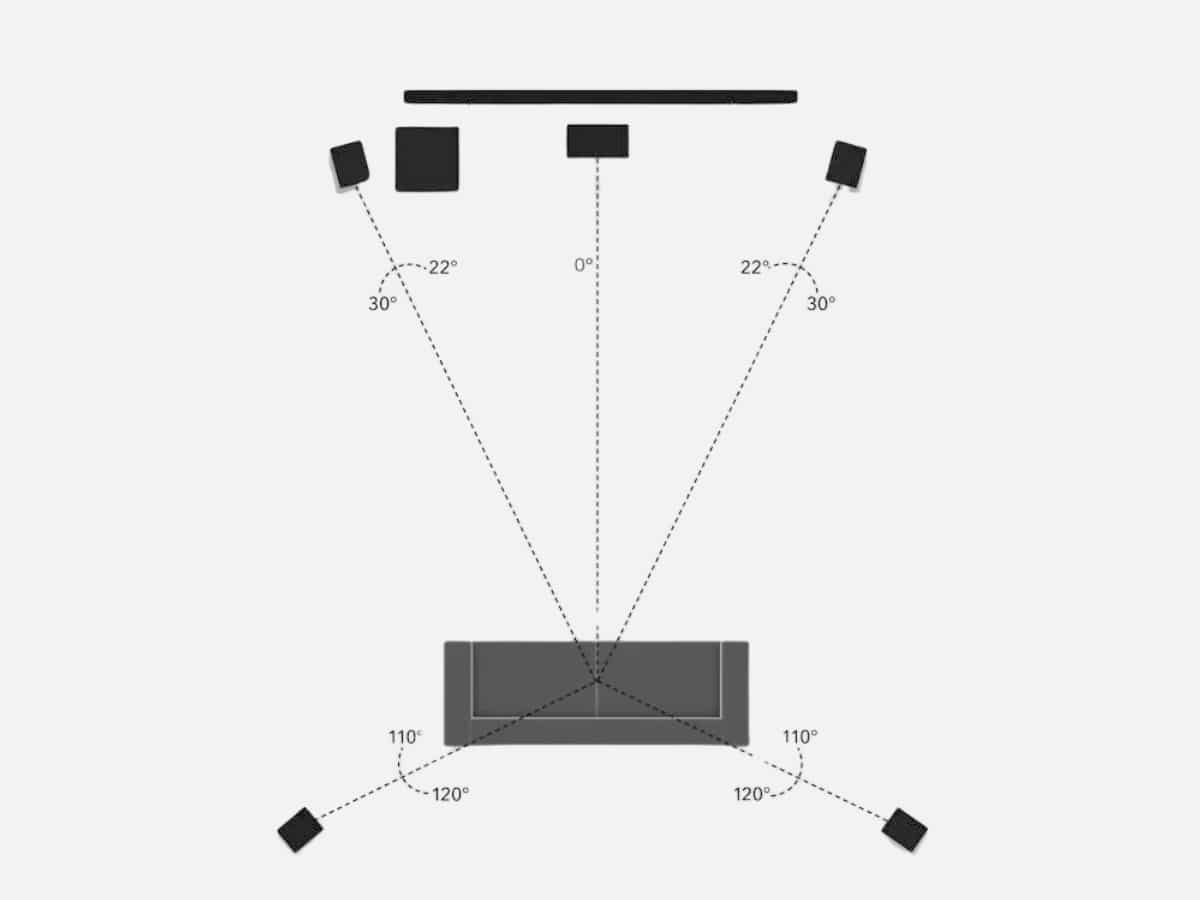
According to Dolby’s surround sound setup guidance, the front left and right speakers in a 5.1 system should sit roughly 22 to 30 degrees either side of the listening direction. The centre speaker, as the name suggests, belongs directly in front, as close to the television as physically possible (and practical).
It’s All About Your Ears
One thing people often overlook when setting up a surround system is their ears. The optimal listening experience should be geared toward what hits your ears. So try to keep the front speakers’ tweeters around ear height when you’re seated.
Once you’ve sorted the height, angling the left and right speakers slightly inward (also known as toe-in) can help focus the sound toward where you’re sitting on the couch. The amount of toe-in depends on the speakers and the room.
Your centre speaker deserves a different dimension of attention. If it’s tucked into a deep entertainment unit, nearby surfaces can obstruct or affect its sound. Move it towards the front edge of the cabinet and, if it’s below the television, angle it towards where people actually sit. Turning the centre channel up won’t necessarily fix dialogue that’s being fired at your knees.
In a 5.1 setup, surround speakers should ideally be positioned to the sides and slightly behind the listener, around 110 to 120 degrees from the forward-facing direction.
It’s a different setup again for the additional surround-back channels in a 7.1 system, which sit further behind the listening position, roughly 135 to 150 degrees from the front. Regardless of your layout, keep the surrounds reasonably close to seated ear height, raising them enough to clear the back of the couch or other obstructions where necessary.
Dealing With Obstructions
In an ideal world, we’d all be able to set up a surround system with impunity. But of course, most of us have to work around windows, furniture, doorways and other people who would rather not live in a speaker showroom. You’ll often see a couch pushed flat against the wall, which can rule out ideal surround positions. In more common open-plan spaces, one side of the room might be completely different from the other. Right now, my couch cushions slightly block my surrounds, so I’ll need to angle them up and toe them in.
Dolby’s 5.1 speaker-placement recommendations are more like guidelines than rules, so you don’t need to rearrange your house to achieve the ideal setup for your current space. Instead, aim for clear paths between speakers and listeners, reasonable separation and a layout you can live with.
For soundbars, the task is a little easier: keep the unit centred beneath or above the screen, clear of cabinet edges and other obstructions. Just be aware that soundbars with upward-firing Atmos drivers also need an unobstructed path towards the ceiling. So keep those decorations and photos of Grandma on the entertainment unit to a minimum.
4. Connect Your Speakers, Subwoofer and TV
Once the speakers are in place, switch everything off and unplug your AVR before connecting the cables. I repeat: TURN EVERYTHING OFF! You don’t want to be that guy who short-circuited their AVR because they were in a hurry. A loose strand of copper bridging positive and negative terminals can trigger the AVR’s protection circuitry, and there’s no reason to risk damaging equipment by wiring it up when it’s powered on.
While you’re at it, consider plugging your AVR into a surge-protected powerboard or outlet. It’s an affordable precaution against some electrical surges, although it won’t protect you from everything. Just ask my dad after one of Sydney’s thunderstorms. Blew through two circuit breakers and wrecked the entire system. Anyway, back to cabling.
Speaker Wiring and Polarity
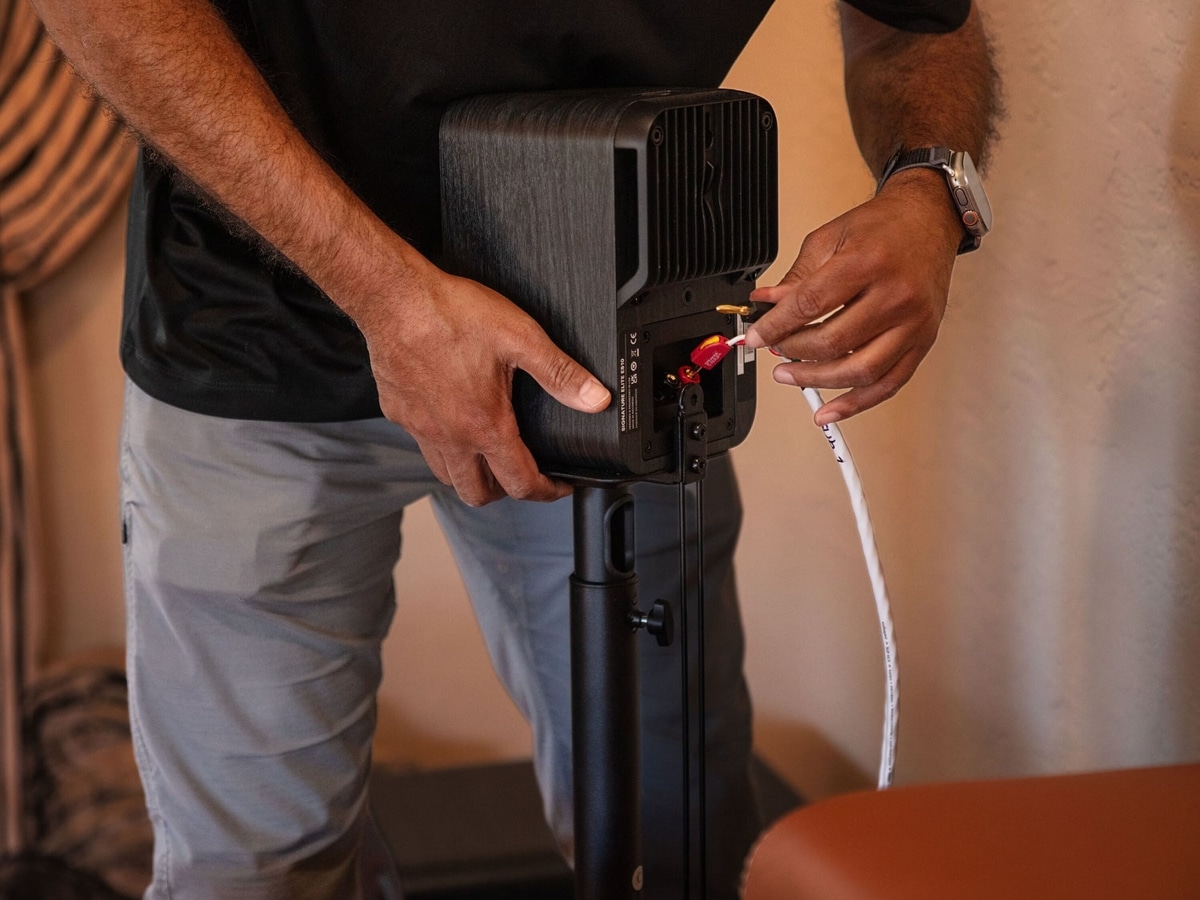
Start by running speaker wire from each passive speaker to the matching terminals on the AVR: front left, front right, centre, surround left and surround right.
Two things matter here: the speaker channel and the cable’s polarity. On most speaker terminals, red means positive (+) and black means negative (-). Match positive to positive and negative to negative at both ends. Some receivers also use separate colours to identify channels, such as white for front left and red for front right, but those labels aren’t the same as polarity.
If you’re using bare wire, strip off a short length of insulation, twist the exposed copper neatly and secure it inside the terminal. Make sure no loose strands are touching the next connection. Some audiophiles swear by bare wire, but another option is banana plugs. These little guys attach to the ends of speaker cables, making it easier to plug and unplug everything. So you don’t have to twist open the connection every time you need to check something. They won’t magically improve the sound, though. A properly secured bare wire does the job just fine. No snake oil here.
Subwoofer Inputs and RCA Cables
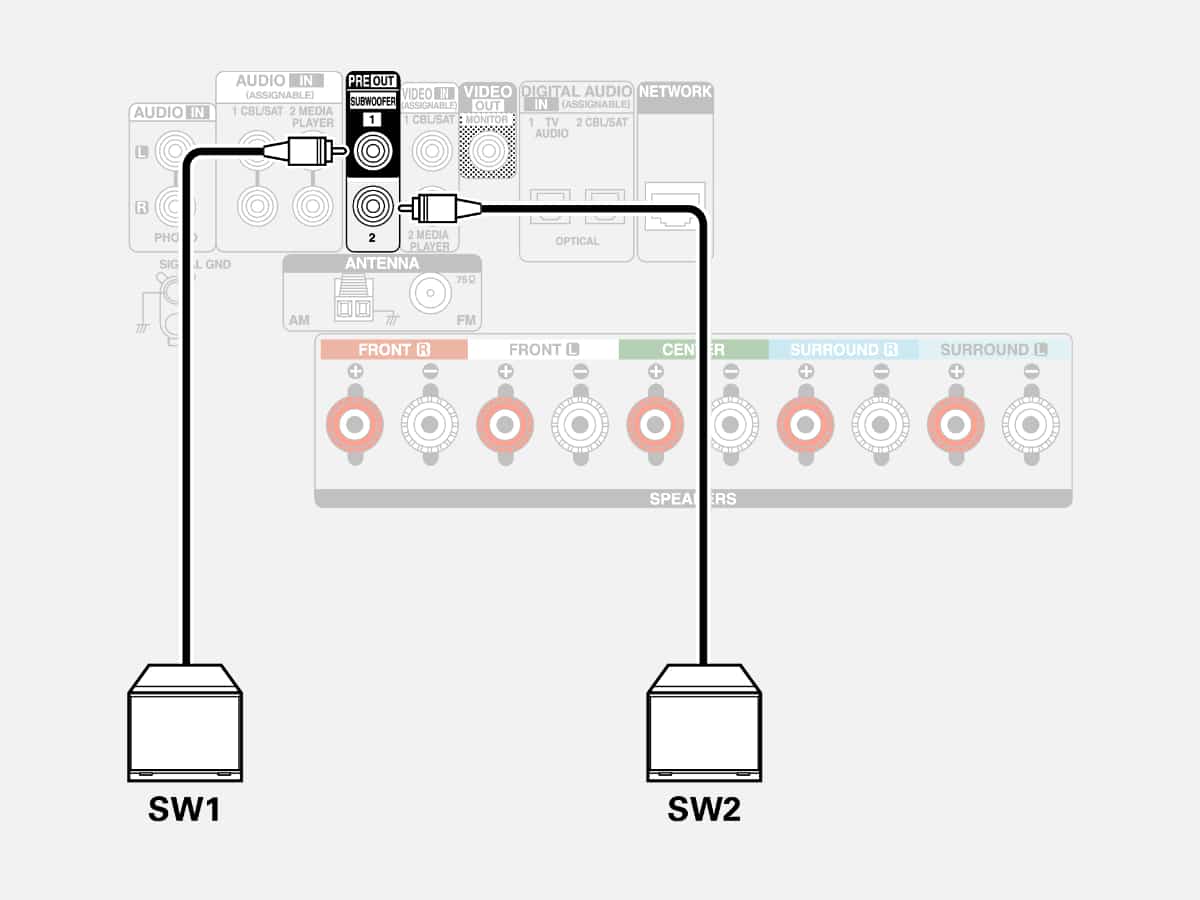
Powered subwoofers connect a little differently. Instead of regular speaker wire, you’ll typically run a single RCA cable from the AVR’s subwoofer output to the matching input on the subwoofer. The cable carries the bass signal, while the subwoofer’s built-in amplifier does the heavy lifting. If you’re not sure where to plug something in, follow the subwoofer’s instructions, particularly if it has multiple inputs or separate crossover controls.
On the back of your AVR, you may notice two subwoofer outputs marked 1 and 2. That’s for anyone who wants to add a second subwoofer (yes, you can have two). If you’re running one sub, use the receiver’s first subwoofer output unless its manual says otherwise. On my Denon AVR-S660H, both outputs carry the same bass signal.
On the older Yamaha YST-SW100, for example, INPUT 1 is for speaker-level connections, which carry an amplified signal from speaker terminals, while INPUT 2 accepts a line-level RCA signal from an amplifier’s dedicated subwoofer output. Always read the labels before plugging anything in.
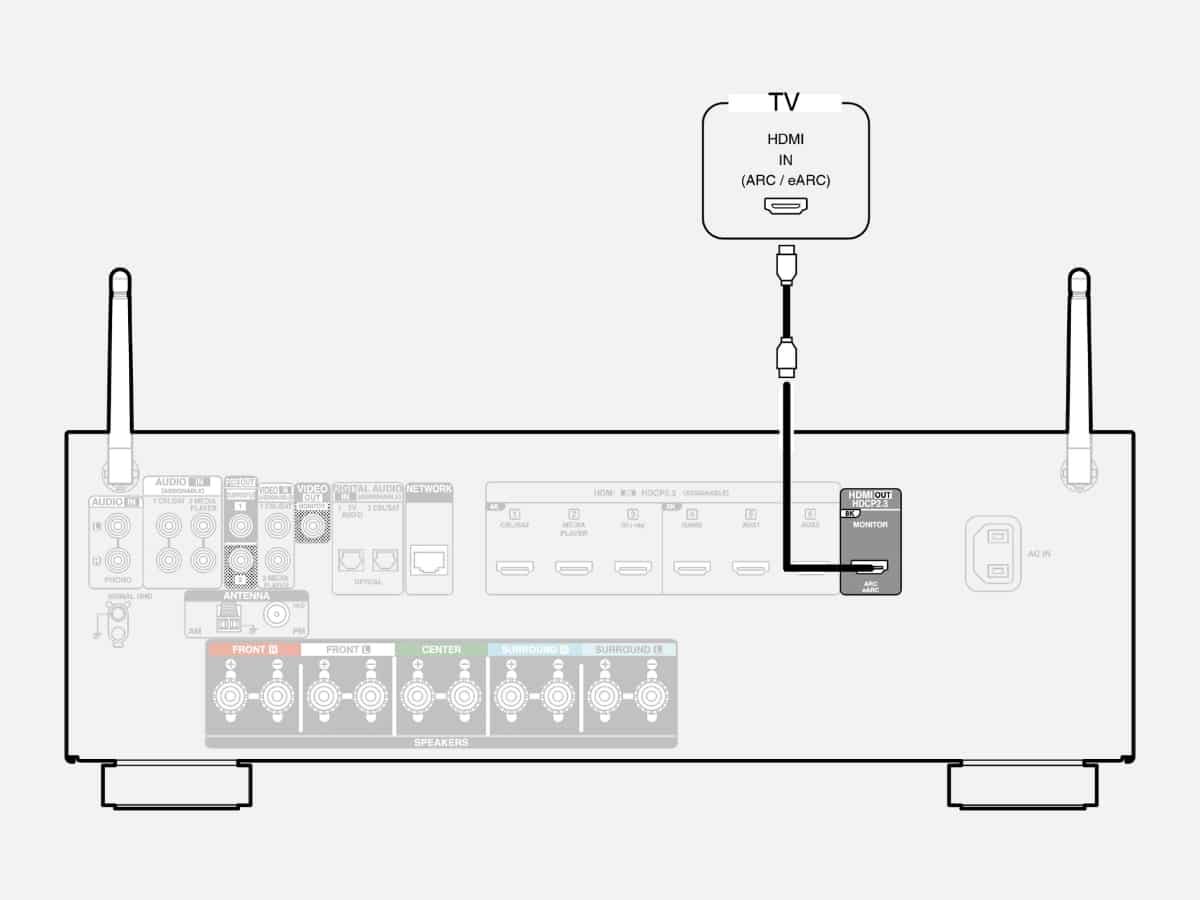
Understanding HDMI Connections
There are two common options for HDMI connections:
- Source → AVR → TV: Connect a console, streamer or disc player to the receiver, which handles the sound and sends video to the television.
- Source → TV → AVR: Connect devices to the television and send the audio back to the receiver using HDMI ARC or eARC.
ARC stands for Audio Return Channel, allowing your TV to send sound back to an AV receiver or soundbar through HDMI. The newer eARC version offers greater bandwidth and supports higher-bitrate audio, including lossless multichannel formats where your devices support them. Dolby Atmos delivered through Dolby Digital Plus can work over compatible ARC connections.
Higher-bandwidth formats such as Dolby TrueHD generally require eARC for audio returned from the television. If you want to dive a little deeper into the fine print, you can read the official HDMI explanation of eARC for the technical differences.
You’ll also need to check your TV’s audio menu to select your external speakers as the output, enable ARC/eARC and choose an appropriate bitstream or passthrough setting, which generally allows the TV to send compatible audio formats to the receiver for decoding. The exact terminology varies, and not every television passes every Dolby or DTS format.
And while I’d love to go through every TV brand and model to help guide you through the setup process, between Sony, LG, Samsung, Hisense, TCL and all the rest, we’d be here forever.
If you’re using a soundbar, the process is a little quicker: connect the bar to the designated HDMI ARC/eARC port, pair any supplied subwoofer and rear speakers, then run its setup app or calibration if available. Wireless components may still need to be plugged in, but you’ll spend less time fiddling with speaker wires and settings.

5. Get Your Subwoofer and Bass Management Right
Subwoofers can be the most tedious part of a setup. Too little bass, and films lose their impact. Too much, and every explosion, soundtrack swell or bass kick starts competing with everything else. Take the docking scene in Christopher Nolan’s Interstellar. Wondering why you can’t hear Cooper yelling “Come on, TARS!” but Hans Zimmer’s organ is still deafening? There’s some work to be done.
Mind you, that’s a pretty intense soundtrack to begin with, so one scene alone doesn’t prove your subwoofer is set up incorrectly.
Finding the Best Subwoofer Placement
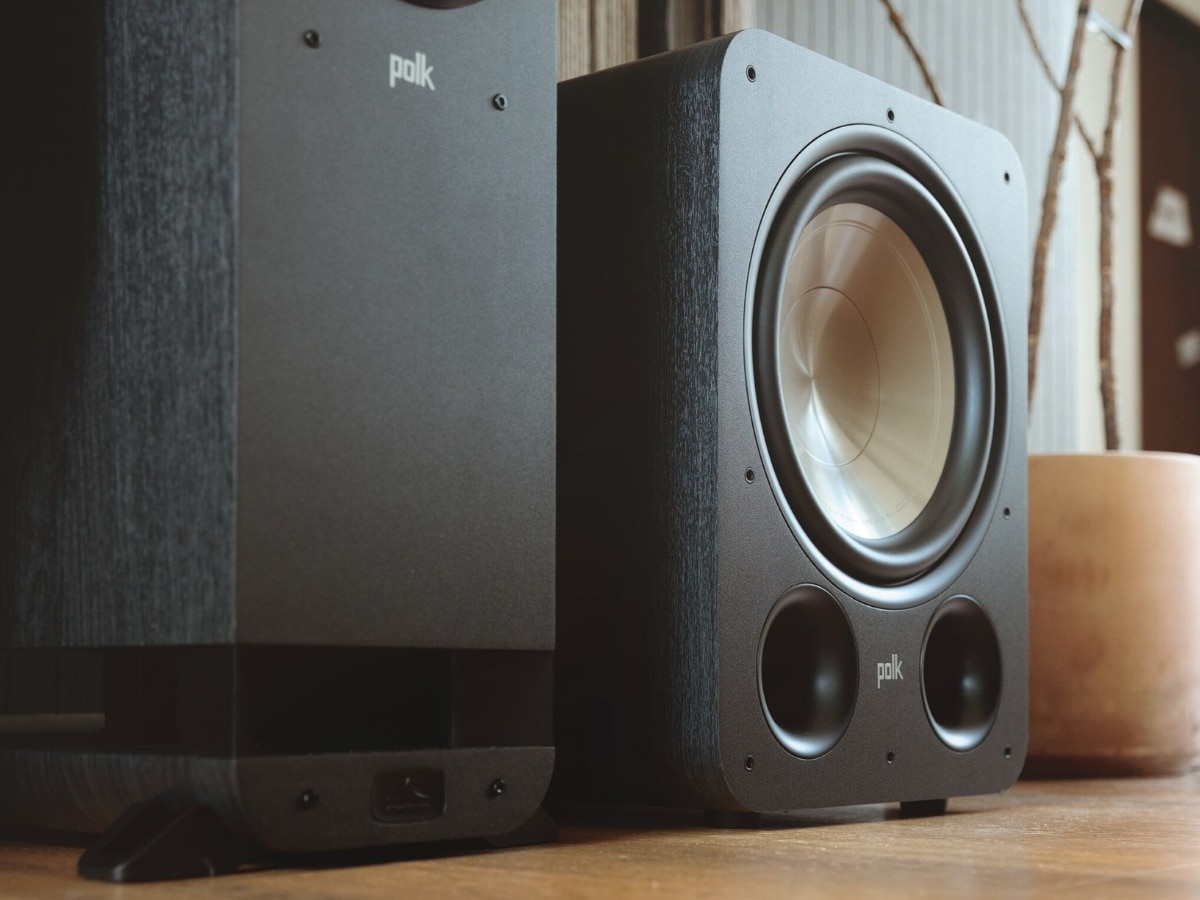
Location and positioning are the first things to consider. Bass interacts heavily with the physical space: walls, corners and the room’s dimensions. Pushing a subwoofer into a corner may make it louder, but not necessarily more even or controlled. Try a few realistic positions and listen from the couch rather than judging it while standing beside the woofer. Low-frequency sounds tend to work a little differently from the rest of the setup, which means partaking in some rather odd routines.
If you have the space and a subwoofer that’s small enough to move around, the ‘subwoofer crawl’ is another option. Place the subwoofer near your listening position, play consistent bass-heavy material and listen at different placement locations until you find the sweet spot. You’ll know you’re getting close when the bass sounds full and balanced, rather than overpowering everything else or barely being noticeable. Crawling around your living room isn’t a substitute for measurement, but it can help you find that elusive Goldilocks zone for the bass.
Subwoofer Crossover Settings
Once you’ve found a workable position, check the controls. When an AVR manages the bass, you generally want to bypass the subwoofer’s low-pass crossover if that option is available. Otherwise, both the sub and receiver may be filtering the same frequencies, making it harder for the bass to blend with the rest of your speakers.
Denon, for example, recommends enabling the subwoofer’s Direct or crossover-bypass mode if available before running Audyssey (their calibration system). If the sub doesn’t have one, Denon recommends setting its crossover to the highest frequency and, if possible, turning off any separate low-pass filter. Starting the subwoofer gain around the midpoint can be useful during calibration, but follow any level warnings rather than treating 12 o’clock as a magic number. And don’t confuse a subwoofer’s Direct switch, which bypasses its crossover, with Direct playback mode on the AVR, which bypasses certain sound-processing features. We’ll get to that shortly.
On the receiver, the speaker crossover determines which low frequencies the receiver redirects from each speaker to the subwoofer. Think of it as the dividing point between the bass your regular speakers handle and the bass passed to the subwoofer. Around 80Hz is a common starting point, but the right setting depends on each speaker’s capability.
This is why a floorstanding speaker isn’t automatically better off set to ‘Large’: on many receivers, ‘Small’ simply means bass below the selected crossover is redirected elsewhere. That redirects low frequencies to the subwoofer rather than removing them altogether. But changing Large to Small won’t fix excessive bass; you still need to balance the subwoofer with the other speakers.
LPF for LFE, LFE and LFE+Main
Do be careful once you’re in the settings. Another thing you don’t want to mix up is LPF for LFE (low-pass filter for low-frequency effects), which filters the dedicated effects channel. On the Denon AVR-S660H, that setting defaults to 120Hz. It’s a different control from the crossover assigned to your centre, front or surround speakers. Why does that matter? Because lowering LPF for LFE can cut frequencies from a film’s dedicated bass-effects channel without necessarily fixing the excessive bass coming from your other speakers.
Likewise, LFE subwoofer mode on a Denon doesn’t mean the sub only plays explosions. It also reproduces bass redirected from speakers configured as Small. LFE+Main can also add bass from the main channels, but more bass doesn’t always mean better bass. Sometimes, there is too much of a good thing.
If your system sounds overwhelming, check the subwoofer level, placement and any loudness-related processing before reaching for your wallet. Change one thing at a time and compare at your normal listening volume. In a shared living room, a bass balance everyone can tolerate beats chasing the biggest possible rumble every time.
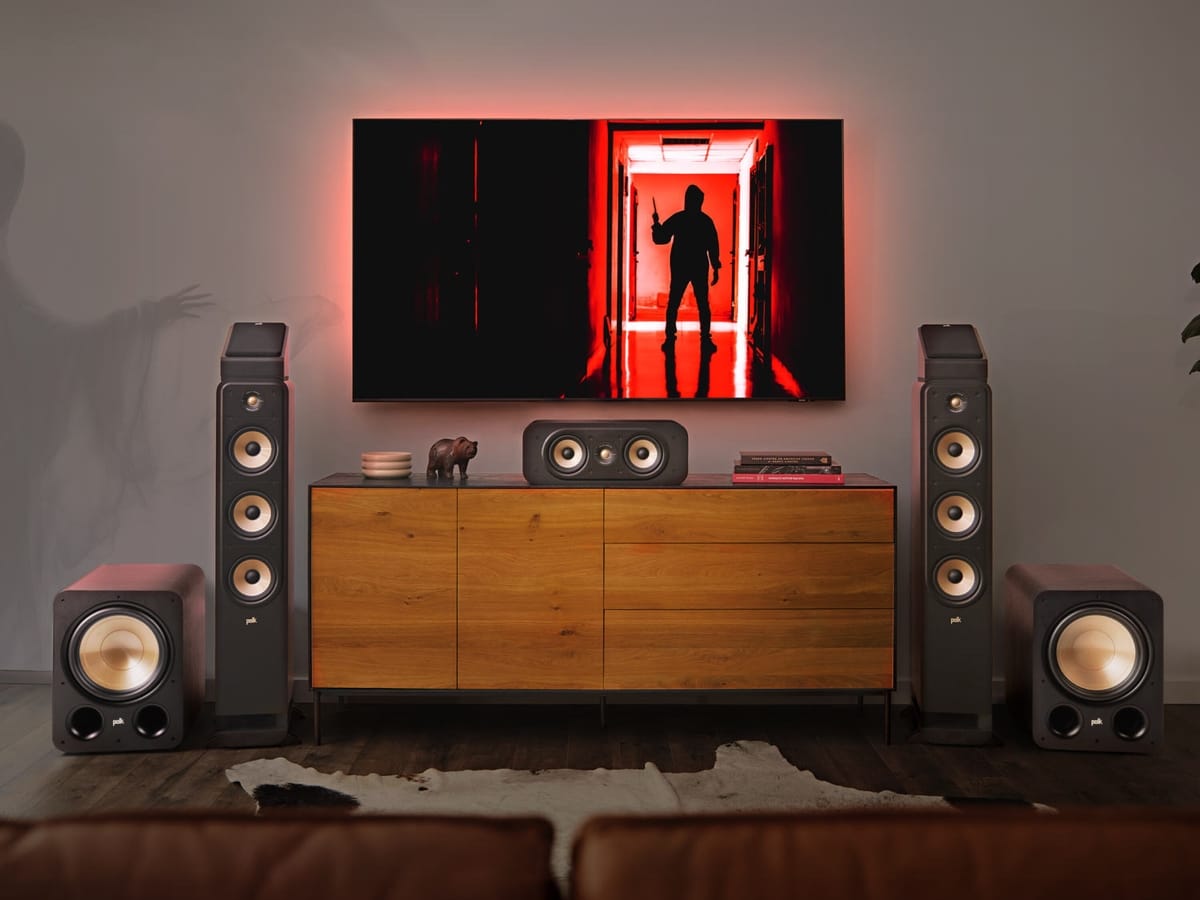
6. Calibrate Your System and Choose a Listening Mode
With the speakers connected and roughly positioned where they should be, check that your receiver recognises the correct speaker layout, including the subwoofer. Once that’s confirmed, it’s time for it to measure the room.
Many modern AVRs include an automatic calibration system, such as Denon’s Audyssey, Yamaha’s YPAO, Onkyo’s AccuEQ or Dirac Live on compatible models. They differ in features and procedure, but the basic job is similar: measure how sound reaches the listening position, then make supported adjustments to speaker levels, timing and frequency response.
If you’re using an older AVR without automatic calibration, you can still set things up manually. Enter the speaker configuration and distances from the main listening position where your receiver allows it, choose suitable crossovers and use its built-in test tones to balance each channel. A basic sound-level meter can help if you have one, but you don’t need a laboratory full of equipment to get started.
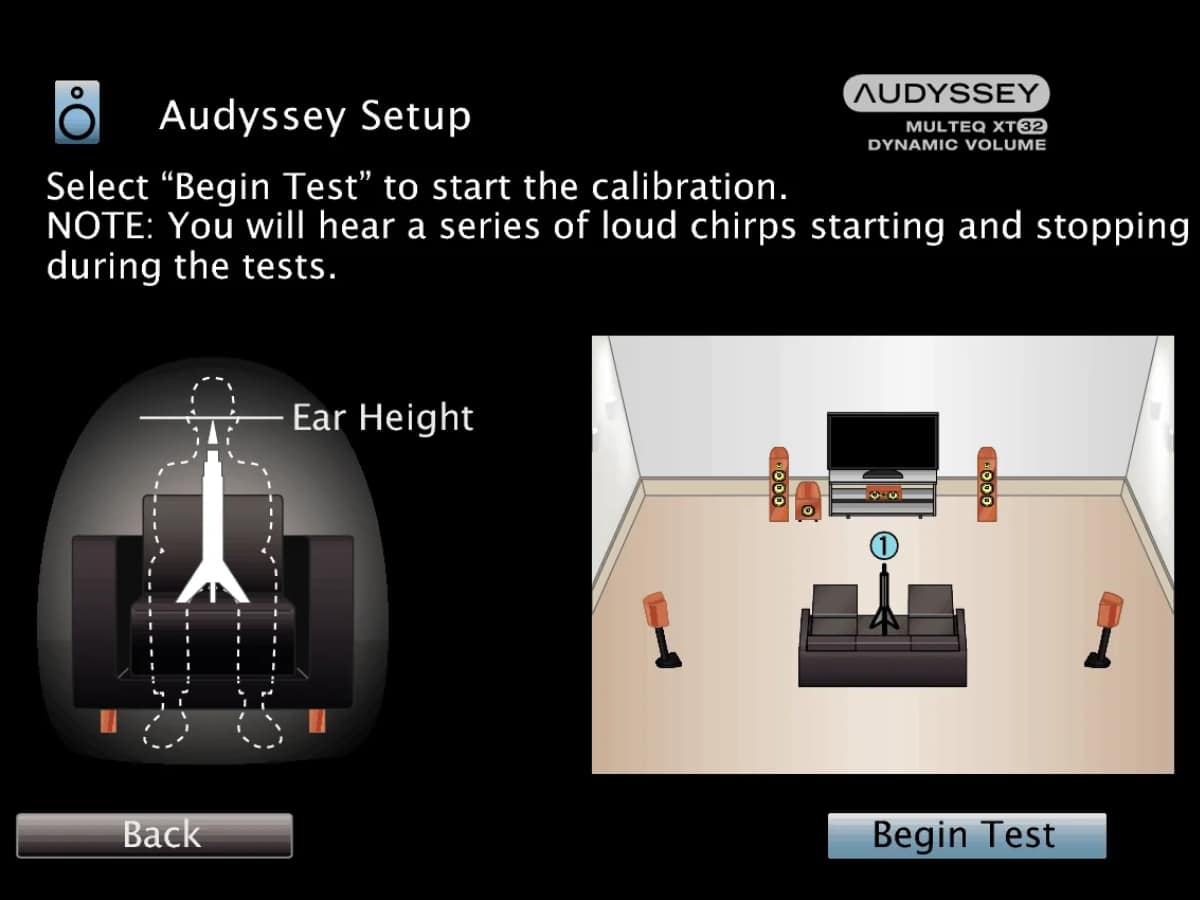
How Your AVR Calibrates Your Surround Sound System
Use the supplied microphone and follow the on-screen instructions. Place it on a stand at seated ear height, keep the room quiet and take the initial measurement at the main listening position. If the system asks for more measurements, keep them in the area where people actually sit rather than spreading them across the entire room.
Afterwards, check that every speaker has been detected correctly. Look at the assigned crossovers, channel levels and distances before deciding whether anything needs attention. A subwoofer’s measured ‘distance’ may include processing delay, so don’t automatically replace it with a tape-measure figure.
Calibration is useful, but it can’t move a poorly positioned centre speaker or eliminate every room-related bass problem. Physical placement and location still matter. And that’s without getting into all the jargon that comes afterwards.
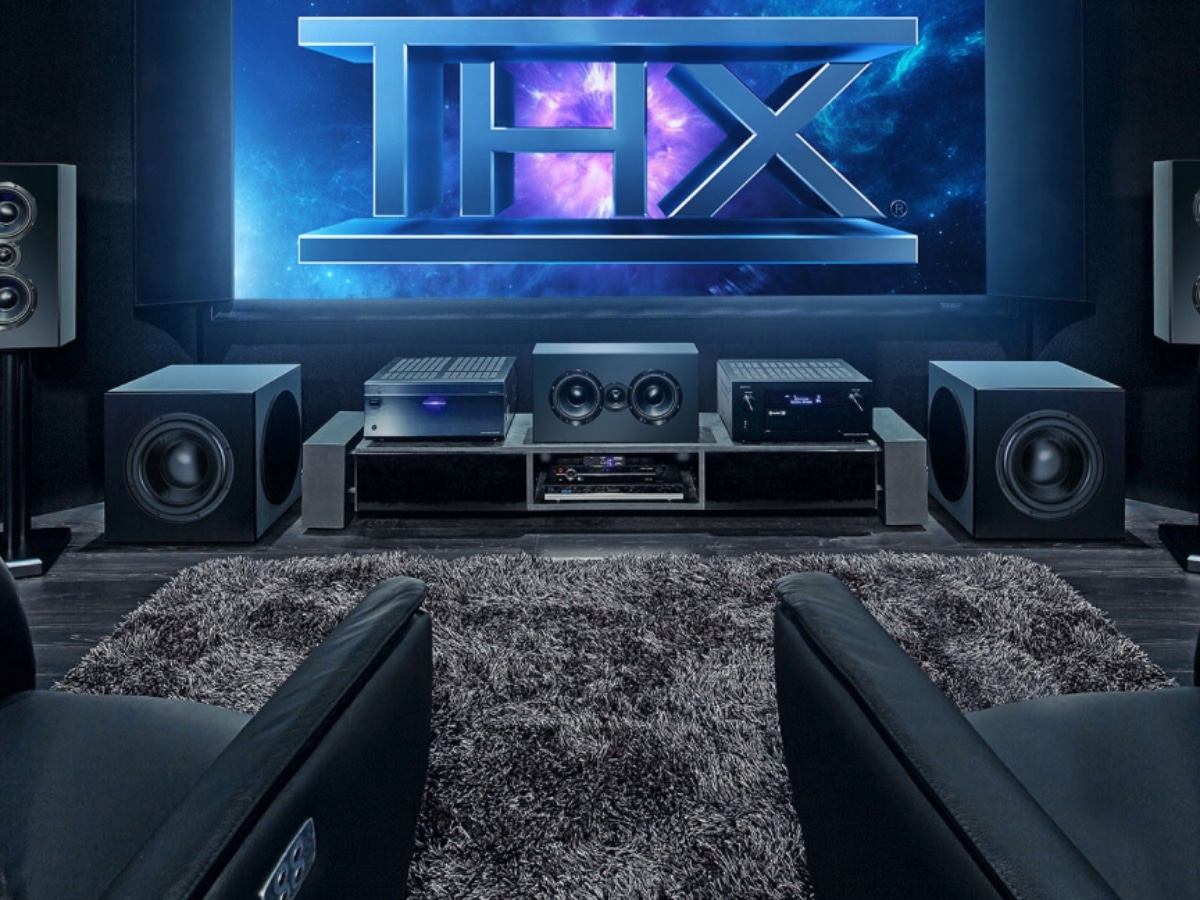
Dolby, DTS, THX: What Do the Logos Mean?
Like any technology-focused hobby or niche, there’s plenty of jargon to break down before you understand what’s going on. Dolby Digital and DTS Digital Surround are established compressed multichannel formats. Dolby Digital Plus is widely used for streaming. Dolby TrueHD and DTS-HD Master Audio are lossless formats that preserve the original audio data and are commonly found on high-quality disc soundtracks.
Dolby Atmos and DTS:X add immersive audio capabilities, including the ability to position sounds in a three-dimensional space on compatible systems. Some soundbars use clever processing to simulate the height and surround effects these formats are designed to deliver.
Atmos can travel within Dolby Digital Plus or Dolby TrueHD, so the format used to deliver the soundtrack isn’t always the same as the immersive technology being advertised on the box. Multichannel PCM is another option, where a source device, like an Xbox or PlayStation, sends already-decoded audio to the receiver across multiple channels.
And THX? You know the company that blew everyone away before the movie began with the deep note? Well, they’re still around, although it’s primarily an audio and visual performance certification system, not another competing soundtrack codec. What I didn’t know is that Razer acquired THX way back in 2016. Fortunately, its certification work continues, with some equipment offering THX-branded listening modes.
The key question is whether your source, TV or receiver can handle the audio format you’re trying to play and whether your speakers can physically reproduce it. For a traditional surround system, the AVR is a crucial part of that chain.
Auto, Stereo and Other Listening Modes
Most AVRs also offer a handful of listening modes. Unlike the Dolby or DTS format arriving from your movie, these settings tell the receiver how to reproduce it, including which speakers to use, whether to expand stereo sound across more channels and how much additional processing to apply.
Auto generally selects decoding based on the incoming signal, making it a sensible starting point for TV and films. Stereo plays through the front left and right channels, with subwoofer support depending on the receiver’s configuration.
You’ll often find different listening mode options depending on what content you’re consuming. My Denon has Movie, Music and Game buttons, each offering a selection of compatible listening modes. You can cycle through them to find something that suits what you’re watching or listening to.
Direct vs Pure Direct: What’s the Difference?
Direct typically bypasses some additional processing to reproduce the source without those adjustments. On the AVR-S660H, it disables Audyssey MultEQ, Dynamic EQ, Dynamic Volume and tone adjustments. Pure Direct, available on some other receivers, goes further by switching off additional circuits or displays.
Direct might sound like the best choice for music, especially if you prefer fewer electronics involved. But if you’re using room correction to help eliminate that troublesome rumble, Direct could actually sound worse because it bypasses that correction.
We recommend comparing modes with familiar tracks at similar volumes before choosing the one that sounds best to you. Dynamic Volume or equivalent late-night settings can also help when big jumps between quiet dialogue and loud effects become annoying.
How to Check Your Surround Sound Is Working
Finally, test everything before settling in for a movie. Use your receiver’s built-in test tones to confirm each speaker plays when it should, then put on a film or show you know has a proper 5.1 surround mix. Check the receiver’s display or audio information menu to see what signal it’s receiving.
On my Denon, for example, you can check whether it’s receiving Dolby Digital, DTS or multichannel PCM, along with the number of incoming channels. And don’t panic if the surrounds aren’t constantly making noise; they’re only supposed to play what’s actually happening in the soundtrack.
7. Troubleshooting Common Surround Sound Problems
If something still doesn’t sound quite right, resist the urge to change five settings all at once. Start with the most obvious cause, then work through a process of elimination to find the culprit.
| Problem | What to check first |
|---|---|
| Dialogue is hard to hear | Centre speaker position and angle, then its calibrated level and any dialogue or dynamic-range settings |
| Bass is too loud or boomy | Subwoofer level and position, crossover settings and loudness processing |
| Bass is weak or uneven | Subwoofer connection, bass routing and placement, including whether bass sounds different at other seating positions |
| Surround speakers are silent | Receiver test tones, correct speaker assignments and whether the source is actually multichannel |
| Everything plays in stereo | Source audio settings, TV passthrough and the selected listening mode |
| No sound through ARC/eARC | Correct HDMI ports, TV audio output, HDMI control settings and receiver input |
| Sound doesn’t match the picture | TV processing and the receiver’s audio-delay or lip-sync settings |
A useful distinction is whether the problem happens on every source or only one. If a Blu-ray sounds fine but a streaming app leaves a bit to be desired, the app, soundtrack or TV audio settings may be involved. For example, if the centre speaker sounds wrong during the receiver’s test tones, check its connection and position before blaming the streaming service or internet connection. If you move speakers, replace components or make substantial changes to the room, rerun calibration before fine-tuning. Yup, sometimes to get things right, you gotta start from the beginning. So don’t lose that calibration microphone.
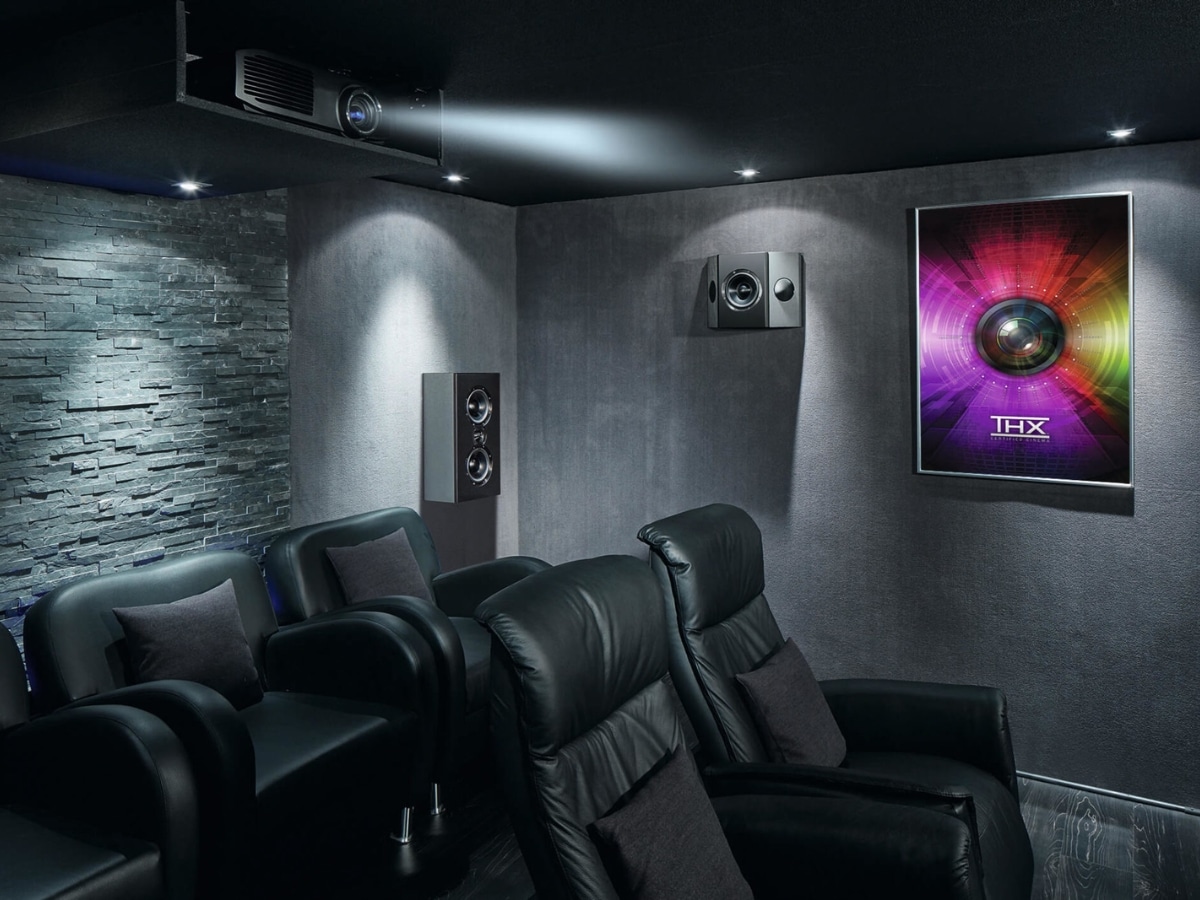
How to Know When to Upgrade Your Surround Sound System
Once everything is working properly, that’s when you can make a judgment call about what your system is missing.
Start by separating three possibilities: something is set up incorrectly, the hardware has reached a genuine limit, or you simply prefer a different sound. Those situations don’t call for the same solution.
Take my AVR. It can power five conventional speakers and decode formats including Dolby TrueHD and DTS-HD Master Audio, which makes it perfectly capable of running a lossless 5.1 system. What it can’t do is decode Dolby Atmos or DTS:X or power a discrete 5.1.2 height-speaker arrangement. If I wanted those additional channels, I’d need a compatible receiver and more speakers.
If the problem is excessive bass or dialogue that’s difficult to hear, replacing the AVR just to get Atmos would miss the point. Placement, calibration and bass management are the sensible places to start. And considering the limited space in my living room, I can’t see myself upgrading anything beyond my AVR anytime soon.
The same logic applies elsewhere. Another subwoofer may help even out bass across the couch, but it also needs careful placement and integration. Bigger speakers might offer more oomph, but they won’t necessarily fix a room-related issue. A soundbar is often the easiest option to live with; even if it gives you less flexibility and control, it’s great for bedroom setups or a TV in the office.
You don’t need to buy the most expensive Hi-Fi gear, or climb all the way to the top of the home-theatre ladder with a complete 9.1.6 setup. If dialogue is clear, the bass is under control, sound follows the action and your neighbours aren’t pounding on your door to turn that damn thing off, your system is working just fine. The next upgrade can wait until you know exactly what you want it to do better. And who knows, maybe that “something better” is just a toe-in or a setting change away.
Surround Sound FAQs
A 5.1 surround sound system is a worthwhile option if you want more immersive audio for movies, TV shows and gaming. With five speakers and a subwoofer, it can provide clearer dialogue, dedicated surround effects and deeper bass than a conventional stereo setup. However, a properly configured 3.1 system or soundbar may be more practical in smaller rooms.
In a traditional 5.1 setup, surround speakers should ideally sit to the sides and slightly behind the main listening position, roughly 110 to 120 degrees from the direction you’re facing. Keep them reasonably close to seated ear height, raising them if necessary to clear furniture or other obstructions.
Quiet dialogue can result from poor centre speaker placement, incorrect channel levels, room acoustics or the soundtrack’s dynamic range. Start by checking that your centre speaker is aimed towards your listening position, then review your receiver’s calibration and dialogue enhancement settings. Dynamic-range compression or a late-night listening mode can also help.
A traditional surround sound system with passive speakers generally requires an AV receiver to decode audio, amplify the speakers and manage channel levels and bass. However, soundbars and some powered speaker systems have built-in amplification and audio processing, so they can deliver surround sound without a separate receiver.




























Comments
We love hearing from you. or to leave a comment.